Showing posts with label Experiments. Show all posts

Tuesday, 12 August 2014

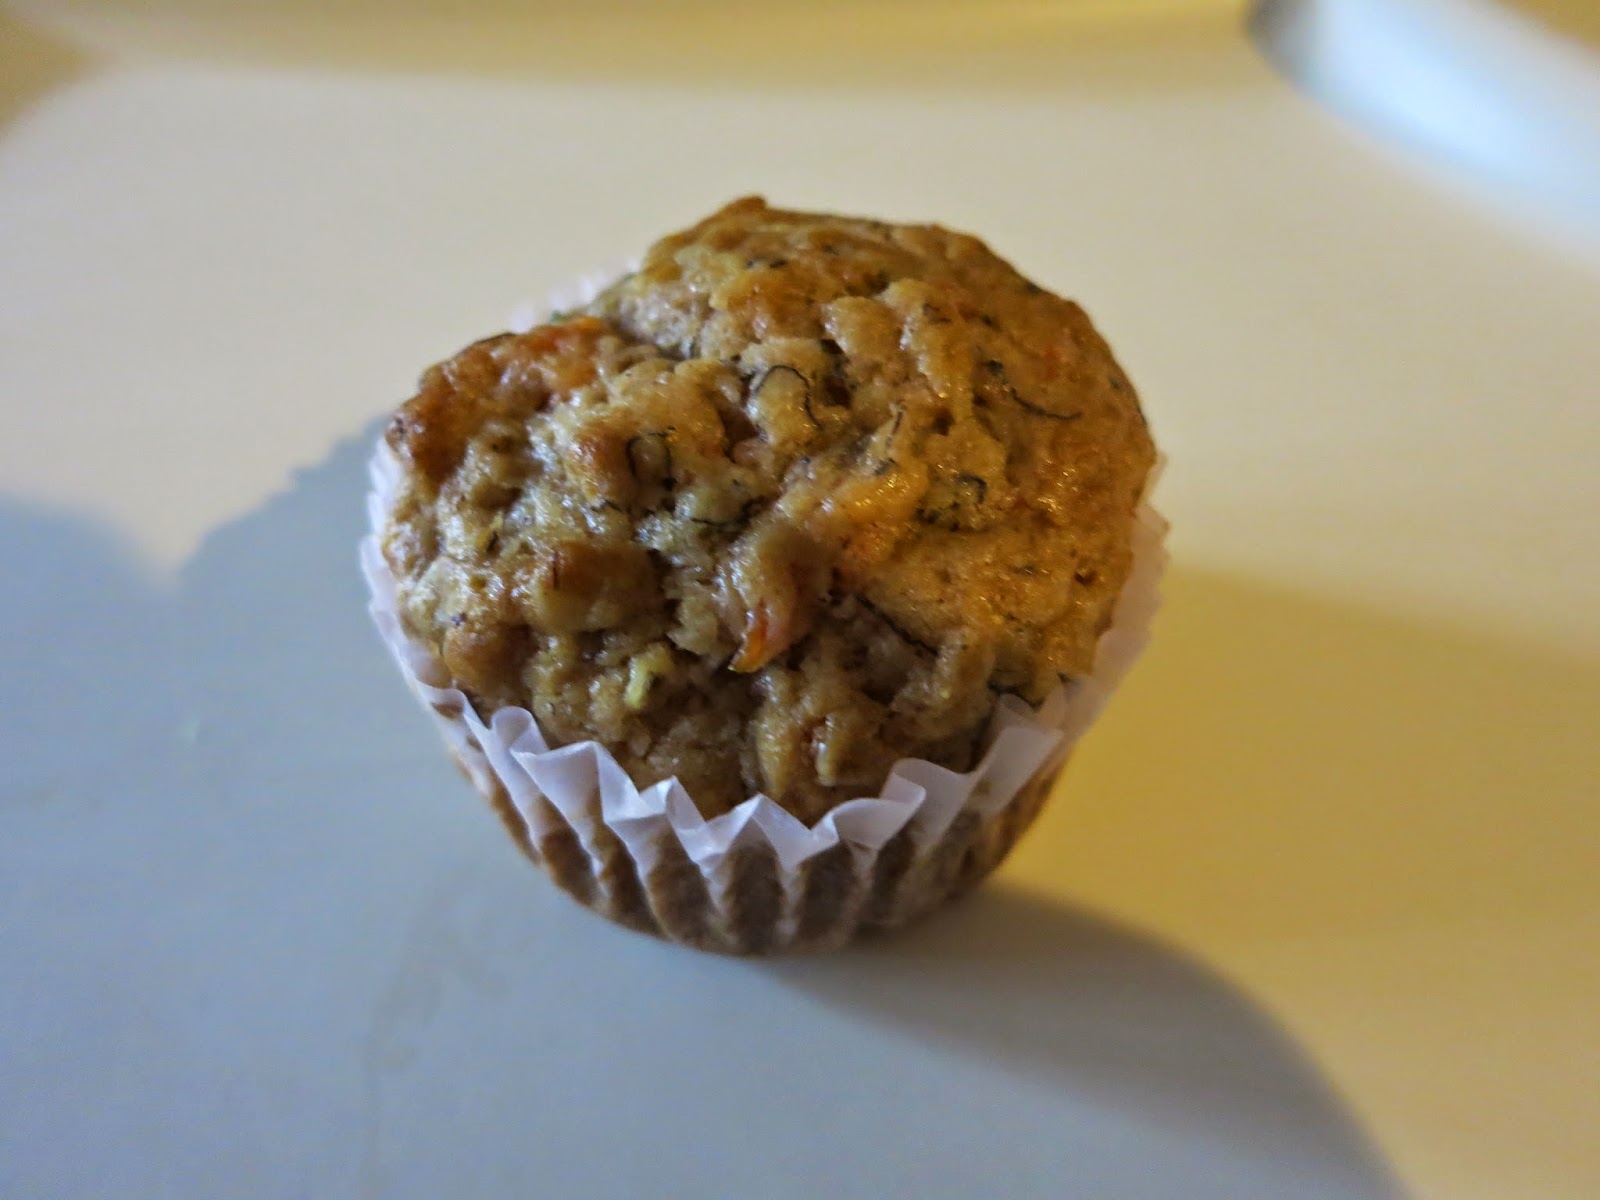
Toddler Muffins

Hi Friends!
I know it's been about a year and a half since I posted a recipe but I've had a busy life since my last post - I had a baby! She's almost a year old now and I was making some muffins for her this morning and thought I would share the recipe with you. I wanted to make her some muffins that were healthy but delicious and not too much work on my part. The basis was my mom's banana muffin recipe with a whole bunch of tweaks, additions and deletions. They are delicious. I am going to make another batch for me for breakfasts. They are sweet because of the fruit but only have 1/2 cup added sugar. I used coconut oil instead of vegetable oil to make them a bit healthier and added oats for fibre and iron. I used regular all purpose flour but you could substitute in half a cup of whole wheat flour if you wanted. I hope you like them!

Toddler Muffins
Prep: 15 minutes | Bake: 15-18 minutes | Yield: 1 dozen

Ingredients
1 very ripe banana, mashed
Unsweetened applesauce (approx. 2/3 cup)
6 TBSP coconut oil, melted and cooled
1/2 cup lightly packed golden sugar
1 egg, well beaten
1/4 cup grated carot
1 tsp vanilla
1/2 tsp salt
1 1/2 cups all purpose flour
1 tsp baking soda
1 tsp baking powder
1/4 cup quick oats
sprinkle cinnamon

Method
1. Put banana in a one cup measuring cup. Add enough applesauce to make 1 cup. Stir
2. Mix together coconut oil and brown sugar in a medium bowl. Add egg and vanilla and stir well. Add in banana/applesauce mixture and carrots and stir well. Set aside
3. In a separate bowl, mix together salt, flour, baking soda, baking powder, oats and cinnamon
4.Mix dry ingredients into wet and stir gently until just moistened. Do not overmix!
5. Spoon into lined muffin tins and bake at 375 degrees Fahrenheit for 15-20 minutes. SHould be golden brown on top when done.

 These muffins freeze well, or stay fresh stored in a freezer zip-top bag for 4 days max.


Saturday, 9 March 2013

Gluten Free Peanut Chicken Pizza

I made this last night for dinner at it was Amazing!! It was inspired by the flavours of  rice wraps with peanut sauce (which include pork or chicken, rice noodles, shredded carrots, green onion, bean sprouts, lettuce, mint, cilantro and peanut sauce wrapped in rice paper wrappers. These are also really, really delicious). The sauce is also nightshade free (no peppers of any kind) and uses gluten free soy sauce.
The crust is from a gluten free pizza mix (the brand is Duinkerken and I found it at Walmart) that is very good. It does not taste like regular pizza crust, but it is a perfectly acceptable substitute with a great texture and flavour (tip: if there is leftover pizza, be sure to heat it up before you eat it as the crust is not good cold. The nice thing though is that the crust will not get tough if you heat it up in the microwave as there is no gluten). I modified the instructions on the box a bit as I have used it before and found that it needs to be pre-baked before sauce is put on. Also, I only have traditional baking yeast, not quick rising yeast, so I had to prepare it a bit differently. I will include instructions for both below. The first 5 ingredients and most of the instructions for making the dough are taken directly from the box.
You make think that carrots on pizza is really weird, but it totally fits with the overall flavour and gives some nice texture on the slice. I have cilantro listed as an optional ingredient, but only use if you like it. I don't like it myself, but I do know the flavour works well with all the other flavours.
It does take some time to prepare, but it is worth it!

Gluten Free Peanut Chicken Pizza
Prep: 45 minutes | Bake: 20-22 minutes at 425 | Makes: 2, 12-inch thin crust pizzas

Ingredients
Crust:
1 box gluten free crust mix (Duinkerken brand)
2 1/2 tsp quick rising yeast (or traditional baking yeast)
2 TBSP canola oil
1 cup warm water
2 eggs

Sauce:
3-4 TBSP smooth peanut butter
5 TBSP gluten free soy sauce
1 TBSP ground ginger
pinch cumin
2 pinches cinnamon
1/2 tsp black pepper
3 TBSP maple syrup (or honey)
1 tsp lime juice
2 cloves minced garlic

Toppings:
3 boneless, skinless chicken breasts
1 cup carrots, cut into matchsticks
3 green onions, sliced thin
300g mozzarella cheese, shredded
2 tsp fresh cilantro, chopped (optional)

Method
1.  Crust: follow the instructions for the dough on the box. It helps to beat the eggs first and mix them with the oil before you add them to the mix. Your fingers will need to be really well oiled or the dough will stick. It takes a bit of effort to press the dough onto the pan, and you will need to oil your fingers regularly and it may not look like it will fit on the pan, but it will, I promise. If you do not have quick rising yeast, use traditional yeast but mix it with the water and 1 TBSP white sugar. Let it proof for at least 5 minutes, then add it to the mix with the eggs and the oil. Pre-bake the crust for 8 minutes
2. Sauce: put the peanut butter in a medium size microwave safe bowl. Add the soy sauce. Heat for 30 seconds in the microwave to help the peanut butter blend better. Add remaining ingredients and mix with a fork until smooth
3.  Cook the chicken breasts in a bit of oil until golden on both sides and cooked through. Cube into small pieces and set aside
4. Divide sauce between 2 pre-baked crusts and spread. It will be just a thin layer of sauce but it packs a big flavour. Top with chicken, carrots and green onions then shredded mozzarella
5. Bake for 12-14 minutes, until golden around the edges and cheese is melted. If using cilantro, sprinkle it on the top after it comes out of the oven.

This is the pizza crust mix

Finished Product
Yum!


Friday, 23 November 2012

Rice Pilaf with Pork

I have never made rice pilaf before. I was never the biggest rice fan but I am learning to be more open to things. I had some instant brown rice in my pantry and wanted to try something new (instant brown rice isn't really "instant" like white rice is, but it only takes about 10 minutes to cook as opposed to 40 minutes. What makes it instant is that it is already partially cooked, then dried. Plus, it's way easier to cook and you don't have to worry about wrecking it by lifting the lid).
I made this with pork stir fry strips, but you could easily substitute chicken or turkey if you wanted.
This recipe looks simple but it is hearty and full of flavour. I served it with a side of steamed garlic zucchini.

Rice Pilaf with Pork
Prep Time: 10 minutes | Cook Time: 20 minutes | Serves: 4

Ingredients:
1 package pork stir fry strips (about 500g)
1 TBSP olive oil
1 small yellow onion, diced
3 cloves garlic, minced
1 3/4 cups chicken broth1/4 tsp each dried parsley and paprika
salt and pepper to taste
2 cups instant brown rice
1 TBSP fresh oregano

Method:
1. Cut stir fry strips into small pieces. In a large, deep pan, cook pork in the olive oil over medium heat stirring frequently until fully cooked, about 6 minutes. Set aside and keep warm.
2. Cook the onion in the same pan that you cooked the pork in. Cook for about 5 minutes, stirring frequently. Add the garlic and cook for 30 seconds.
3.  Add the broth and bring to a boil. Add rice, all spices (except the fresh oregano) and salt and pepper and stir until completely mixed. Top with cooked pork. Turn heat to medium-low and cover. Cook for 5 minutes
4. Remove from heat. Stir in fresh oregano. Cover again and let stand for 5 minutes. Stir and serve.


Sunday, 14 October 2012

Turkey and Ricotta Shepderd's Pie

My Mother-in-law inspired this post as she first came up with this idea for my husband's birthday lunch last month. The secret is adding ricotta cheese to the filling - it keeps it moist, helps it stick together and makes it amazingly creamy. She put crushed corn flakes on top of the potatoes under the cheese which gives it a nice crunch and it compliments the flavours very well - I didn't have cornflakes so I made it without and it worked fine. I would probably add them next time I make this.
This is my version - just made it for dinner and it was so, so good. Plus, it's gluten free, for those who can't eat gluten.

Turkey and Ricotta Shepherd's Pie
Prep Time: 35 minutes | Cook Time: 15 minutes | Serves: 4


Ingredients:
1 pound lean ground turkey
1/2 cup frozen corn
1 TBSP dried onion flakes
1/4 tsp each ground sage and dried oregano
2 tsp Johnny's Garlic Seasoning (or garlic powder)
salt and pepper to taste
300g light, extra smooth ricotta
3-4 large red skin potatoes, peeled and cubed
6 cloves garlic, peeled and smashed
2 chicken bouillon cubes
water
2 TBSP butter
3-5 TBSP 1% milk
1 TBSP Johnny's Garlic Seasoning (or garlic powder)
salt to taste
about 200g grated monterey jack or cheddar cheese (or a mix of both)

Method:
1.  Pre-heat the oven to 400 degrees Fahrenheit.  Put the diced potatoes, smashed garlic and crumbled bouillon cubes in a large pot and cover with water. Boil until potatoes are tender, about 20 minutes. Drain, reserving 5 TBSP cooking water. Mash the potatoes. Add the butter and mix it in. Add the milk 1 TBSP at a time until you reach your desired consistency (they should be creamy and smooth but still fairly thick)
2. Meanwhile, cook the ground turkey in a large, deep pan until no longer pink. Add all spices and corn. Cook for about 5 minutes. Add the ricotta cheese and the 5 TBSP potato water. Mix throughly.
3. Put the turkey mixture in a 9x9 square casserole dish. Top with the mashed potatoes and then the cheese. Bake for 15 minutes, until the cheese is melted and bubbly. Blast under the broiler for 2 minutes more. Let sit at least 3 minutes before cutting and serving.


Monday, 8 October 2012

Double Chocolate Peanut Butter Cookies

If you like chocolate and peanut butter together, you're going to love these. They're chocolate-y, peanut butter-y, crispy on the outside, chewy on the inside and totally delicious.
I wasn't entirely sure if there were going to work as they were an experiment, but they did and I'm really happy with the result.

Double Chocolate Peanut Butter Cookies
Prep: 25 mins | Bake Time 10 minutes | Yield: 3-4 dozen

Ingredients:
1/2 cup softened butter
1/2 cup packed brown sugar
1 cup white sugar
1/2 cup smooth peanut butter
2 squares semi-sweet baker's chocolate, melted and cooled slightly
1 tsp vanilla
2 eggs
2 1/4 cups all purpose flour
1 tsp baking soda
1 cup semi-sweet chocolate chips

Method:
1. Cream together the butter and the sugars until smooth and creamy using a wooden spoon. Add the peanut butter and mix well. Add the melted chocolate (make sure it has had some time to cool because you don't want it to melt the butter) and mix well. Add the vanilla and the eggs, one at a time, mixing well after each egg.
2.  Add the flour and baking soda to the peanut butter/chocolate mixture. Blend until just mixed. Add the chocolate chips and stir until incorporated
3. Drop by small teaspoonfuls onto an ungreased, non-stick cookie sheet, about 1 inch apart (if your cookie sheet is not non-stick, grease lightly with a bit of vegetable oil or no-stick spray or line with parchment paper).
4. Bake at 375 degrees Fahrenheit for 10-11 minutes. Check after 10 minutes - if the cookies are very puffy looking, bake for 1 minutes more (this will give them the crunch on the outside ad the chewy centre).
5. Let sit on baking sheet for 1 minute. Transfer to a wire rack and cool for 3 minutes. Put them in an air-tight container while they are still warm.

Be sure to enjoy one or two while they're still warm from the oven with a tall glass of milk


Saturday, 25 August 2012

Featured Recipe

Okay, these are amazing. Not to toot my own horn or anything, but I was very very happy with the way these turned out. I was a wee bit worried about the flavour and that's the biggest problem with making meatloaf - you can't taste it until it's completely done. Thankfully, they worked and were delicious. I was worried that they would be too spicy, but they weren't at all and had a really nice smoky taste - just what I was hoping for. Not too much work either . We ate them with Mac and Cheese and a side salad.

Smoky Pork Mini-Meatloaves

Ingredients:
1 lb lean ground pork
1 poblano pepper, diced
1/4 red onion, chopped
1 TBSP olive oil
1/4 tsp each dried oregano and paprika
1/2 tsp cumin
1/2 tsp each salt and pepper, divided
1 TBSP Johnny's Garlic Seasoning
2 pinches chipotle chili powder
1 tsp hot sauce (i.e. Frank's Red Hot Sauce)
4 TBSP BBQ sauce (I used Bullseye)
1/4 cup quick oats

Method:
1. Heat olive oil in a pan over medium heat. Add poblano and onion. Cook until very soft, about 12 minutes, stirring frequently. Season with half the salt and pepper. Puree in a food proceesor until smooth. Cool in the freezer for 5 minutes
2. Add all remaining ingredients into a large bowl. Add pepper mixture. Gently mix with your hands until just mixed (be careful not to mix the meat too much as that can make your meatloaf tough).
3. Form into mini loaves (about the size of a hamburger patty and about 1.5 inches thick). Cook at 400 degrees Fahrenheit on a drip tray  for 20 minutes (the drip tray helps them get crispy all the way around as the fat can drain off); flip and cook for 20-25 minutes more (until the temp reads 170 on a meat thermometer).


Sunday, 12 August 2012

Featured Recipe

This idea came about from a conversation with my brother-in-law (who is also a bit of a foodie) who was telling me about savoury waffles. We had quite the conversation about all the different kinds that could be made and, to be honest, he beat me to the punch and made ham, cheese and broccoli waffles a few months ago. I made these tonight and they were really, really good! I made a bell pepper sauce to go on them which just rounded out the whole flavour. If you're looking for a savoury option for breakfast (or dinner), these are the waffles for you!

Savoury Ham and Cheese Waffles with Bell Pepper Sauce

Ingredients (waffles:)
1 1/3 cups flour
2 tsp baking powder
1/2 tsp salt
1/8 tsp paprika
1 1/4 cups milk
5 TBSP vegetable oil
2 eggs, separated
150 grams of sharp cheddar cheese
6 slices deli ham, coppped

Method:
1. Mix dry ingredients in a large bowl. Set aside
2. Separate the eggs. Put the egg yolks in a medium size bowl, beat with a fork and set aside. Put the egg whites in a glass bowl and beat with a mixer until stiff peaks form. Set aside
3. Mix the remaining wet ingredients, except egg whites, into the bowl with the egg yolks. Add the ham and the cheese
4. Make a well in the dry ingredients and pour the wet into the well. Mix gently until everything is incorporated. Gently fold in the egg whites
5. Cook on a hot, non-stick Belgian waffle maker (round waffles with really big "holes"). Cook until deep golden. Serve with bell pepper sauce (recipe follows)


Ingredients (sauce)
1 each red and poblano peppers, roughly diced
1/2 green pepper
1/4 small red onion, roughly diced
1 splash grapeseed oil
1/4 tsp dried oregano
1/2 tsp Johnny's Garlic Seasoning
1/2 tsp each salt and pepper
1/2 vegetable (or chicken) bouillon cube
1/4 cup water

Method:
1.  Heat the grapeseed oil in a large pan. Cook the peppers and onion for about 5 minutes, until soft.
2. Add the remaining ingredients (except the water) and cook for about 3 minutes more. Turn off the heat.
3. Add the water to de-glaze the pan. Pour into a large bowl and puree with a hand blender (or use a regular blender) until pureed (but don't make it super smooth, you want it to have some texture). Serve warm over fresh waffles.

Waffles with the sauce on top

This sauce would also be really good on pizza.


Monday, 16 July 2012

Featured Recipe

Ok, to be completely honest, I have never had a pulled pork sandwich before. I understand the basics (that pork shoulder cooked low and slow until it's fall-off-the-bone tender and then shredded ("pulled") and simmered in a sweet-smoky sauce and piled high on a soft white bun) but I've never actually eaten one. So when thinking of what to make for dinner tonight (I have been very bad about meal planning and have had to think on the fly for a few days now) I asked my husband to take the pork strips out of the freezer as I was planning to make something with that and some quinoa and whatever few veggies are still in the fridge. He said "we have these really nice buns, why don't you make pulled-pork sandwiches." I said okay but I started to panic a wee bit since, as indicated above, I have never eaten one before and was worried about getting the flavour right. The panic quickly passed and the wheels started turning and what came out tasted "pretty close to bang-on" (according to the hubby). Not bad for trying to re-create a flavour you've never tasted.
These are not "traditional" as I did not cook a pork shoulder for hours and hours until it was uber tender (I cheated and used pork stir fry strips) and I did no actual "pulling" but the flavour was good and they were totally satisfying (and it didn't take me all day).

Pulled Pork Fakies

Ingredients:
1 package uncooked pork stir fry strips (enough for 4 large sandwiches)
2 green onions, minced
1 TBSP vegetable oil
2 TBSP ketchup
1/4 cup thick teryaki sauce (I used Kikkoman brand)
1 tsp barbeque sauce (I used Bulls Eye brand because it's not as vinegar-y as some other brands)
1 tsp lime juice
2 dashes Worcestershire sauce
1 smidge cinnamon (a smidge is about half a pinch or, if your spice is in a shaker jar, one light shake)
1 smidge ginger powder
1 smidge red pepper flakes
1 pinch black pepper
4 large soft, good quality white buns 

Method:
1. Slice the pork into very thin slices, then into pieces around 2cm long or so
2. Heat a large pan over medium-low heat (if your burner dial has 8 increments, put it at about 4). Add the oil, green onion and pork and cook, stirring frequently, until pork is cooked through and no longer pink (7-10 minutes)
3. Make the sauce. Add all the remaining ingredients (except the buns) in a small bowl and mix thoroughly with a fork. Add to the cooked pork
4. Turn the heat to high and bring mixture to a boil. Simmer, stirring frequently, until the sauce is reduced and thickened and clings to the meat (about 12-15 minutes)
5. Slice each bun in half and top with a quarter of the meat mixture. Enjoy!


Sunday, 17 June 2012

Featured Recipe

Today's recipe is a variation on basic baking powder biscuits but they are more like a scone than a biscuit. They are sweet but not too sweet and have a pleasant texture. They are particularly good warm from the oven with a bit of butter. I substituted vegetable oil for the traditional shortening as I hate cutting in shortening - it does give it a spongier texture than shortening, but it is much faster and less hassle.  I added Peach/Passionfruit curd that I had in my pantry, but you could add apricot or peach jam instead. The curd is nice because it is made with butter and it is not as sticky as jam. Lemon curd would be really lovely too. You could add blueberries or blackberries instead of raspberries if you wanted.   

Peach/Passionfruit Raspberry Biscuits

Ingredients:
3-3/12 cups all purpose flour
3 teaspoons baking powder
1 tsp salt
1 TBSP white sugar
1/2 cup vegetable oil
1 cup peach/passionfruit curd
3/4 cup milk
3/4 cup frozen raspberries

Method:
1. Mix together 3 cups of the flour, the baking powder, salt and sugar in a medium sized bowl
2. Add the veg oil, milk and fruit curd. Mix well. Add the frozen raspberries and mix well. The dough should be really soft and a bit sticky, If it is too sticky, add more flour
3. Gently pat about 1/2 cup of the dough into a disc about 1.5 cm thick and about 6-8cm in diameter. Place on an ungreased cookie sheet. Repeat with remaining dough, leaving about 3 cm between biscuits. It should make between 9-12 biscuits
4. Bake at 450 for 8 mins, then turn the pan 180 degrees (so the the biscuits that were at the front of the oven are now at the back) and bake for 5 mins more. They will be light golden on the top and a rich brown on the bottoms when they are done.
6. Let cool at least 10 mins before serving. Freeze any leftovers


Experiments in the Kitchen

 Today was a gloomy, grey day - perfect for baking. I wanted to make cookies so I asked my husband what kind he wanted and his suggestion was Chocolate Thimble Cookies. I make these at Christmas every year and they are his favourite (they're one of my favourites too), but I ended up giving most of them away this year and I did promise him I would make a batch just for us. It is now June....I guess it was time.
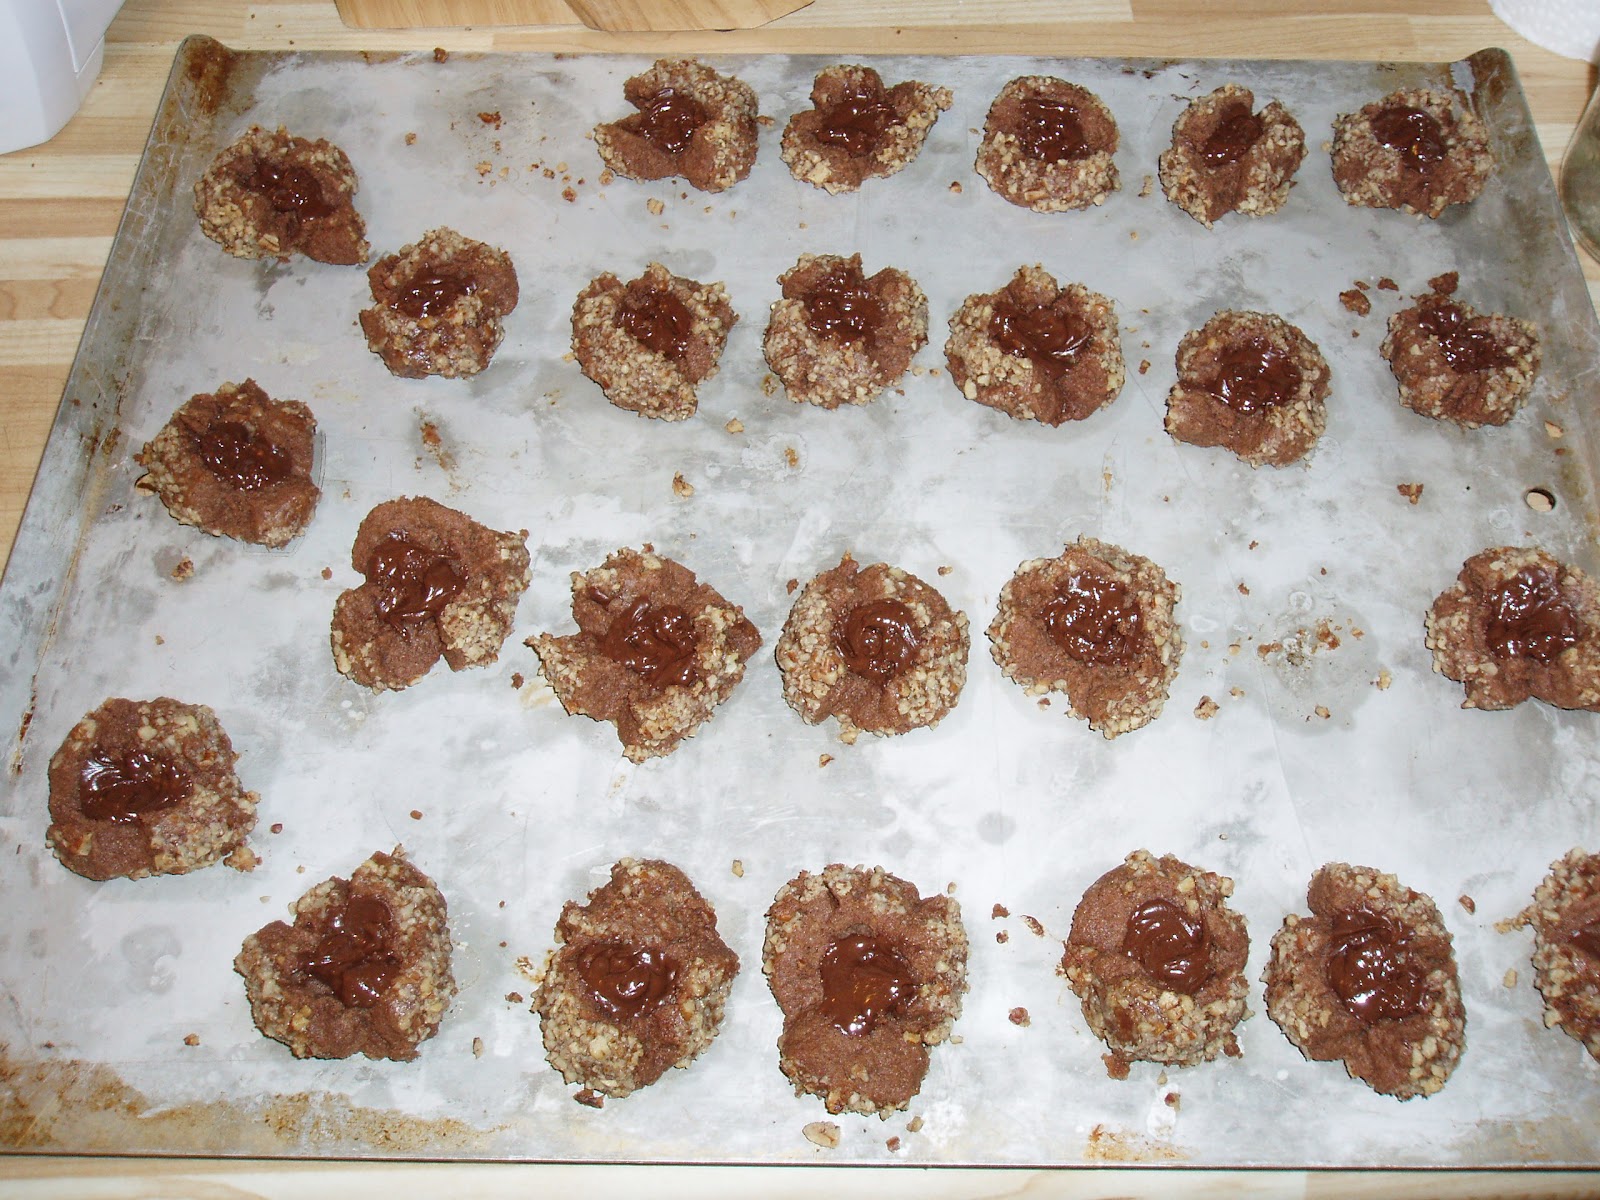
Chocolate Thimble Cookies are made with a chocolate dough that you roll into balls, then in nuts (pecans are best), the when they're on the baking sheet, before they go in the oven, you make a depression in the middle with your finger. When they come out of the oven, you put 4-5 chocolate chips in the depression and when they melt, you swirl them with a toothpick. (A traditional version of these cookies are called thumbprint cookies and are usually a white dough with jam in the middle). 

Experiment #1:

Terr's suggestion was to make the dough chocolate/peanut butter - I can't believe I had never thought of this before! I figured I could just substitute half the butter for peanut butter and everything would be good. Yeah, that didn't work too well. My dough was really dry and crumbly and was impossible to roll into balls. I ended up adding more butter (in total about 3/4 of what the original recipe called for) and even then they we drier than they should have been. I managed to roll them, though they did fall apart a wee bit when I tried to put the depression in. They actually managed to hold together fairly well as they baked and weren't too dry to enjoy. The flavour was incredible and I would totally do it again. Lesson: substituting peanut butter for butter does not work. Next time, add the full amount of butter, plus the same amount of peanut better. If I need to add more flour, so be it.
Was it a success? Yes! Just a few minor tweaks and they'll be perfect!


Experiment #2:

I also wanted something that I could take in my lunches to have for my coffee break. I toyed with the idea of muffins, but decided on biscuits in the end. But, of course, I couldn't make just plain baking powder biscuits - I was in a creative mood. I settled on Peach/Passionfruit Raspberry biscuits. I had a jar of Peach/Passionfruit curd in my pantry and some frozen raspberries. I had to adjust the amount of flour becuase of the curd and the raspberries, but they totally turned out. They're a little spongier than normal biscuits and are more like a scone.   
Was it a success? Totally! They are delicious and will be nice in my lunch.So good, in fact, that they are this week's featured recipe!