Showing posts with label Fast and Easy. Show all posts

Tuesday, 12 August 2014

Toddler Muffins

Hi Friends!
I know it's been about a year and a half since I posted a recipe but I've had a busy life since my last post - I had a baby! She's almost a year old now and I was making some muffins for her this morning and thought I would share the recipe with you. I wanted to make her some muffins that were healthy but delicious and not too much work on my part. The basis was my mom's banana muffin recipe with a whole bunch of tweaks, additions and deletions. They are delicious. I am going to make another batch for me for breakfasts. They are sweet because of the fruit but only have 1/2 cup added sugar. I used coconut oil instead of vegetable oil to make them a bit healthier and added oats for fibre and iron. I used regular all purpose flour but you could substitute in half a cup of whole wheat flour if you wanted. I hope you like them!
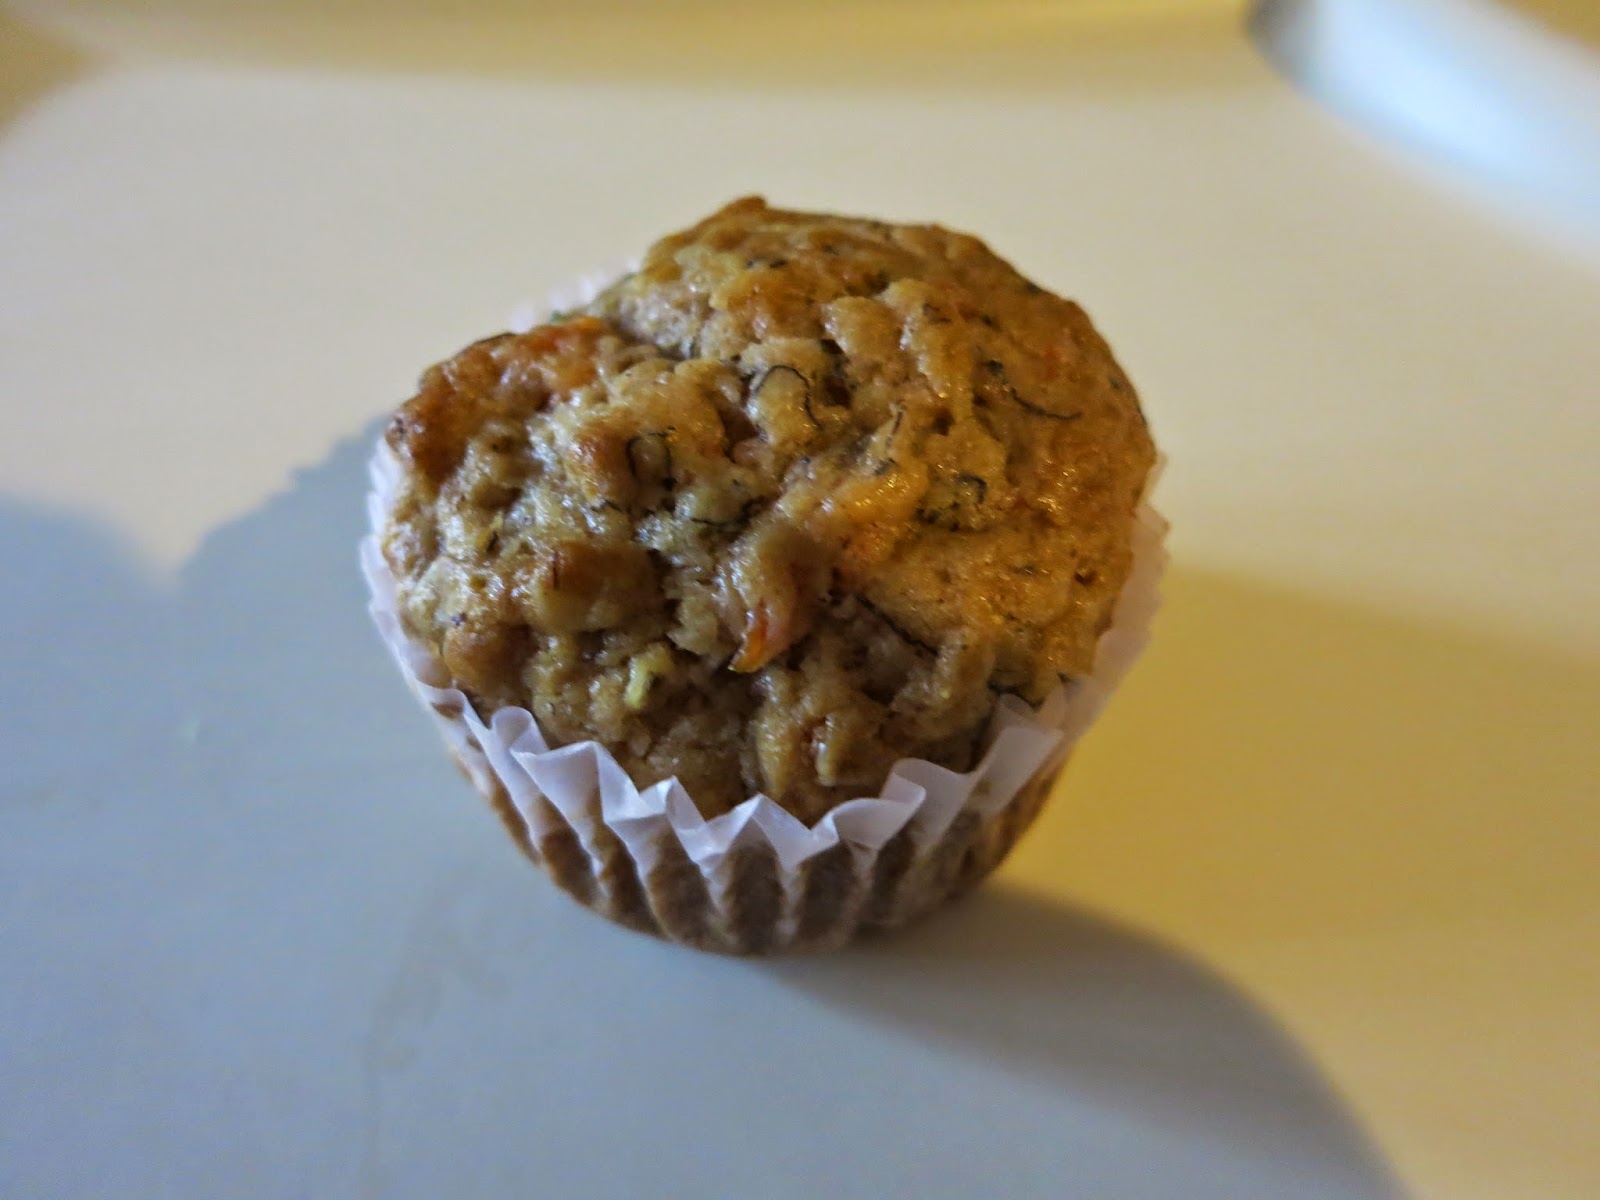

Toddler Muffins
Prep: 15 minutes | Bake: 15-18 minutes | Yield: 1 dozen

Ingredients
1 very ripe banana, mashed
Unsweetened applesauce (approx. 2/3 cup)
6 TBSP coconut oil, melted and cooled
1/2 cup lightly packed golden sugar
1 egg, well beaten
1/4 cup grated carot
1 tsp vanilla
1/2 tsp salt
1 1/2 cups all purpose flour
1 tsp baking soda
1 tsp baking powder
1/4 cup quick oats
sprinkle cinnamon

Method
1. Put banana in a one cup measuring cup. Add enough applesauce to make 1 cup. Stir
2. Mix together coconut oil and brown sugar in a medium bowl. Add egg and vanilla and stir well. Add in banana/applesauce mixture and carrots and stir well. Set aside
3. In a separate bowl, mix together salt, flour, baking soda, baking powder, oats and cinnamon
4.Mix dry ingredients into wet and stir gently until just moistened. Do not overmix!
5. Spoon into lined muffin tins and bake at 375 degrees Fahrenheit for 15-20 minutes. SHould be golden brown on top when done.

 These muffins freeze well, or stay fresh stored in a freezer zip-top bag for 4 days max.


Friday, 23 November 2012

Rice Pilaf with Pork

I have never made rice pilaf before. I was never the biggest rice fan but I am learning to be more open to things. I had some instant brown rice in my pantry and wanted to try something new (instant brown rice isn't really "instant" like white rice is, but it only takes about 10 minutes to cook as opposed to 40 minutes. What makes it instant is that it is already partially cooked, then dried. Plus, it's way easier to cook and you don't have to worry about wrecking it by lifting the lid).
I made this with pork stir fry strips, but you could easily substitute chicken or turkey if you wanted.
This recipe looks simple but it is hearty and full of flavour. I served it with a side of steamed garlic zucchini.

Rice Pilaf with Pork
Prep Time: 10 minutes | Cook Time: 20 minutes | Serves: 4

Ingredients:
1 package pork stir fry strips (about 500g)
1 TBSP olive oil
1 small yellow onion, diced
3 cloves garlic, minced
1 3/4 cups chicken broth1/4 tsp each dried parsley and paprika
salt and pepper to taste
2 cups instant brown rice
1 TBSP fresh oregano

Method:
1. Cut stir fry strips into small pieces. In a large, deep pan, cook pork in the olive oil over medium heat stirring frequently until fully cooked, about 6 minutes. Set aside and keep warm.
2. Cook the onion in the same pan that you cooked the pork in. Cook for about 5 minutes, stirring frequently. Add the garlic and cook for 30 seconds.
3.  Add the broth and bring to a boil. Add rice, all spices (except the fresh oregano) and salt and pepper and stir until completely mixed. Top with cooked pork. Turn heat to medium-low and cover. Cook for 5 minutes
4. Remove from heat. Stir in fresh oregano. Cover again and let stand for 5 minutes. Stir and serve.


Saturday, 3 November 2012

Quick Chicken and Sausage Jambalaya

This post is really hard for me to write. I learned yesterday that a colleague was killed in a car accident while she was on vacation overseas. She and I used to talk about food all the time and she loved reading my blog. I shared this recipe with her several years ago and it was her favourite. Every time she made it she would thank me for giving her the recipe and exclaim how good it was. So, Catherine, this post is for you.
My favourite kind of sausage to use in this is Capital brand turkey sausage,  but any kind of ready-to-eat sausage would work (kielbasa is yummy.)

Quick Chicken and Sausage Jambalaya
Prep Time: 15 minutes | Cook Time: 30 minutes | Yield: lots

Ingredients:
2 boneless, skinless chicken breasts, diced
1 TBSP olive oil
1 ring turkey or ham sausage, sliced
1 small yellow onion, diced
1 each green, red and yellow peppers, diced
3 large cloves garlic, minced
1 can diced stewed tomatoes
1 cup chicken broth
5-6 heaping handfuls instant brown rice (or more, if you like)
2 pinches ground sage
2 pinches dried thyme
1 1/2 tsp dried oregano
2 good shakes Worcestershire sauce
1 pinch red pepper flakes (or more, to taste)
salt and pepper (to taste)

Method:
1. Heat the olive oil in a large, deep pan over medium heat. Add the chicken, onion and sausage. Cook, stirring occasionally
2. When the chicken is halfway cooked, add the peppers, garlic and all the spices. Cook, stirring occasionally until the chicken is cooked through.
3. Add the Worcestershire sauce, tomatoes, broth and rice. Stir until incorporated. Cook until the rice is done and most of the liquid is gone, about 15 minutes.   


Thursday, 25 October 2012

Quinoa Stirfry with Chicken Thighs

This is what I made for dinner tonight and the hubby declared that it was his favourite quinoa dish I've made. Quinoa is so easy to make and I love that it's a complete protein. Plus, it's gluten free!This recipe uses broccoli slaw, which is a pre-made slaw mix of shredded broccoli, carrots and cabbage - it gives the stirfry a satisfying crunch and it's full of all sorts of good vitamins.

Quinoa Stirfry with Chicken Thighs
Prep time: 10 mins | Cook time: 20 mins | Serves 4-6

Ingredients:
1 cup quinoa
1 cup water
1 chicken bouillon cube
4 skinless, boneless chicken thighs
1 TBSP olive oil
1/4 cup onion, diced
2 green onions, diced
3/4 cup broccoli slaw
1/8 tsp each cumin, ginger powder and paprika
salt and pepper to taste
1/2 tsp lemon juice
2 TBSP soy sauce

Method:
1. Rinse the quinoa cold water. Put in a small saucepan and cover with 1 cup water. Crumble the bouillon cube into the water and stir. Cover and put over medium heat and bring to a boil. Once it is boiling, reduce the heat to low and simmer for 15-20 minutes. Resist the urge to lift the lid to check on it. Check after 15 minutes - you will know it is done because the grains will be translucent and all of the water will be absorbed. If it is not quite done, cook for 5 minutes more. Fluff with a fork and let sit about 5 minutes
2. While the quinoa is cooking, cook the chicken. Heat the olive oil in a large pan. Cook the chicken over medium-low heat for about 15 minutes, turning several times. You want it to get crispy on the outside but be careful not to burn it. The chicken should be no longer pin in the middle and the juices will run clear when you cut into it.
3. When the chicken is cooked, remove it to a cutting board. Add the onion to the pan and give it a quick stir. Cut the chicken into small pieces. Once the onion had been cooking for about 5 minutes, return the chicken to the pan. Add the green onions and stir. Cook for about 3 minutes. Add the broccoli slaw, the lemon juice, the soy sauce and all the spices. Stir and cook for about 3 more minutes. Add the quinoa and stir. That's it!


Wednesday, 10 October 2012

Pita Pizzas with Pancetta and Fresh Oregano

This recipe was inspired by a recipe I saw in an Australian Women's Weekly cookbook I have but the only similarities are that they are pizzas without tomato sauce (their recipe is just olive oil with garlic and mine is a white sauce with garlic/shallot) and include pork (theirs is ham, mine is pancetta), fresh herbs (they use sage, I use oregano) and cheese (their fontina to my mozzarella). So really, not at all similar.
I like Byblos brand pitas because they are really thin and have a great flavour, but use whatever pitas you can find (Byblos bakery is based in Calgary, AB and they distribute through out Western Canada so you may not be able to get them elsewhere).
Pancetta is Italian bacon, but please, please do not substitute bacon in this recipe. Pancetta has a different flavour and you will be disappointed if you don't use it. You can find already diced pancetta in the deli section of most grocery stores.

Pita Pizzas with Pancetta and Fresh Oregano
Prep Time: 20 minutes | Bake Time: 15 minutes | Yield: 6 pizzas

Ingredients:
6 whole wheat pitas
3 cloves garlic, minced
1 medium shallot, minced
1 scant cup 1% milk
1 TBSP flour
150g diced pancetta
dash of black pepper and salt
2 TBSP fresh oregano, chopped
300g grated mozzarella

Method:
1. Cook the pancetta over medium heat, stirring frequently, until the edges start to brown, about 10 minutes. Remove pancetta to a bowl; keep the fat released by the pancetta in the pan
2. Cook the garlic and the shallot in the pancetta fat until very fragrant but not brown, about 1 minute
3. Add the flour to the milk and mix well
4. Reduce the heat under the pan to medium-low and slowly add the milk/flour mixture, stirring constantly. Add the pepper and salt (resist the urge to salt the sauce more than just a dash as the pancetta is very salty). Sitr frequently until the sauce is thickened and is a uniform consistency 5-7 minutes. Remove form heat
5. Preheat the oven to 425 degrees Fahrenheit. Divide the pitas on 2 baking sheets. Divide sauce evenly between pitas and spread with a spatula. Sprinkle pancetta equally over pitas, then the oregano, then the cheese
6. Bake for 7 minutes, then turn the pan 180 degrees (so the pizzas that were at the back of the oven are now at the front). Return pizzas to the oven and bake for 5-7 minutes longer (until cheese is melted and bubbly). Let sit for 2-3 minutes, then slice in half and serve

Pizzas before the cheese has been added

Finished product. Yum!

Saturday, 6 October 2012

Linguine With Garlic Oil and Pancetta


 I made this a short while ago for dinner and it is amazing. I found the recipe in the book Nigella Bites by Nigella Lawson (it is the recipe, in fact that made me want her cookbook). It is posted on her website and I thought I'd share it with you. It is so easy to make and so delicious!
The recipe calls for garlic infused oil, which I didn't actually have, so I just cooked 3 smashed garlic gloves in 2 TBSP of olive oil for about 2 minutes, then discarded that garlic and used that oil and it worked just fine.


Saturday, 14 July 2012

Featured Recipe

For some reason, I have a lot of eggs in my fridge. And they will all hit their expiry date before the end of the month and I didn't want them to go bad. Solution: crustless quiche! The nice thing about a crustless quiche is that it is way lighter and does not have the heavy greasiness of a pastry crust, so it is nice even on a summer day.  Plus, it takes way less time to prepare. A meat thermometer is handy for this dish as the eggs need to be at least 160 degrees Fahrenheit to be fully cooked but not over 180 or they will turn kind of rubbery. 


Crustless Quiche

Ingredients:
6 large eggs
2 TBSP 1% milk
salt and pepper to taste
1/4 green (or red) pepper, finely diced
1 cm wide section red onion, finely diced
1/4 cup bacon bits
1/4 cup grated cheddar cheese
cooking spray or vegetable oil

Method;
1. Pre-heat the oven to 400 degrees F
2.  Crack eggs into a medium size bowl. Whisk with a fork together with salt, pepper and milk. Set aside
3. Spray a 9x9 pan with cooking spray (or brush lightly with vegetable oil). Put peppers, onion and bacon in the bottom of the pan and pour the egg over top
4. Top with grated cheese and bake for 20 minutes (eggs need to be at least 160 degrees F but not more that 180 degrees F) 
5. Let cool for 5 minutes, then cut into squares


Here are a few other flavour variations to try:
  • mushroom, spinach and gruyere
  • ham, broccoli and swiss
  • sundried tomato, basil, mozzarella
  • turkey sausage and monterey jack cheese
  • mild Italian sausage (pre-cooked), red pepper, parmesan and mozzarella 

Wednesday, 4 July 2012

Featured Recipe

I ADORE apple crisp. A lot. The soft apples, the cinnamon, the crunchy granola topping....yum! And my mom makes the very best apple crisp in the world. Sadly, my husband cannot eat cooked apples so I do not make it very often. Plus, it's a lot of work to have just 1 person eat it. So.....I have come up with a 1 serving version that is super quick, low carb, low fat and totally delicious!

Guiltless 5 Minute Apple Crisp

Ingredients:
1 medium McIntosh apple (soft apples like McIntosh work best)
2 shakes of cinnamon
1 tsp brown or white sugar
2 TBSP Kashi Go Lean Crunch cereal or other granola (Go Lean Crunch is the best for this but Harvest Crunch would be good too)

Method:
1. Peel apple and cut into bite-sized pieces. Place in a microwave safe bowl and sprinkle with the cinnamon and sugar
2. Cook in mircowave on high heat for 1 minute. Stir and cook for another 30 seconds or so.
3. Top with cereal and let sit for 1 minute to cool.

For an added treat, top with vanilla ice cream or vanilla yogurt

Saturday, 24 March 2012

Featured Recipe

Pita Pizza. So simple, so delicious. The trick is to use thin pita. If you live in a place where you can buy Byblos Bakery Pita (it's a bakery in Calgary, AB and I know you can get them at some stores in Greater Victoria, BC), use that because it's the best. If you have kids, it might be fun to use the little pita pockets (see picture at right); if not, use the regular size ones. If you can't find Byblos, make sure you use a thin pita (I think Olafson's makes one). Then, top anyway you like. Below is my favourite combo.

Pita Pizza

6 pitas (white or whole wheat)
pizza sauce*
1 green pepper, finely diced
1/4 red onion or 1 shallot, finely minced
pepperoni
bacon bits (optional)
shredded Monterrey jack or mozzarella (or a blend)

Method:
  1. preheat the oven to 425. Place the pitas on a baking sheet (you may need 2 sheets to do all the pizzas)
  2. spread the pitas with pizza sauce. Top with pepperoni, bacon (if using), green pepper and onion. Cover with cheese
  3. bake for 7 minutes. Rotate the pan 180 degrees (so the pizzas that were at the back are now at the front) and bake for 7-8 minutes longer, until the cheese is melted and bubbly.
  4. let cool for 3-4 minutes. cut in half and serve warm
You may never buy frozen pizza again!

*note: we have discovered that most tomato sauces do not really agree with my husband, so we were looking at different sauces that we could use to replace pizza sauce and still have it taste like pizza. We used an alfredo sauce, which he said was a nice change, but we just recently tried this Butternut Squash pasta sauce by Dave's Gourmet (see picture at left) that we had in the pantry and it was spectacular on pizza! The flavour was similar to pizza sauce but without tomato. I almost like it better than tomato sauce. You have got to try it, if you can find it (Costco, I think)

Saturday, 21 January 2012

Featured Recipe

I used to hate broccoli. I would pick it out of things or would choke it down with lots and lots of milk. As I've gotten older, I have realized there are worse things than broccoli and that it is actually really good for me. So I've had to come up with ways to make it more appealing to me. I have discovered that if I pair it with flavours I enjoy (lemon and garlic, in particular), it's not so bad. Here's one of those new ways:

Broccoli Slaw
Serves 2

1/2 package broccoli slaw mix (approx 150 grams)
2 TBSP mayo
1 TBSP milk
pinch of black pepper
1/4 tsp dried dill
1 tsp garlic powder (use Johnny's Garlic seasoning, if you have it)
1 tsp lemon juice

Method:
1. Mix all the ingredients except the slaw and the lemon juice in a small bowl. Use a fork or a small whisk to stir the dressing until smooth and creamy
2. Add the lemon juice and stir to mix (adding it after everything is mixed together prevents the milk from curdling)
3. Pour over the broccoli and stir to mix. Serve immediately.

This is also nice as a sauce for steamed broccoli

Monday, 12 December 2011

Featured Recipe

Here's a quick filling meal you can make on a weeknight. Delicious on a cold winter night when the wind is howling. This has a bit of kick from red pepper flakes and will warm you right up.
Tip: if you have Johnny's Garlic Powder (you can get it at Costco), use it in place of the regular garlic powder as it adds more flavour.

Weeknight Beef Stew

Ingredients:
1 pound cubed lean beef (not stew meat as it's not tender enough)
4 medium red skin potatoes, peeled and cubed
1 cup baby carrots, diced
1 medium yellow onion, diced
1 green pepper, diced
splash extra virgin olive oil
3-4 cups beef broth
3 TBSP plain tomato sauce
1/4 cup flour
1 tsp each dried oregano, parsley and thyme
1 TBSP garlic powder
2 pinches red pepper flakes
1 tsp Worcestershire sauce
Salt and pepper to taste


Method:
1. Cook the potatoes, onions and carrots in a large non stick pot in a little olive oil until the potatoes are fork tender but still a little firm. Transfer to a bowl and set aside
2. Season the beef with salt and pepper, to taste. Cook the beef in the pot you cooked the potatoes in until cooked through. If liquid collects in the pot, spoon it into the bowl with the potatoes (there's a lot of flavour in that liquid)
3. Once the beef is cooked, return the potato mixture, along with any liquid to the pot. Add 3 cups of beef broth and the tomato sauce. Stir. Add all the spices, the green pepper and the Worcestershire sauce.
4. Mix the flour with 1/2 cup remaining beef broth until there are no lumps. Stir into the pot.
5. Simmer over medium heat for at least 10 minutes, uncovered, until the potatoes are melt-in-your-mouth soft and the stew has thickened. If you like a thinner stew, add the remaining beef broth.

Thursday, 13 October 2011

Featured Recipe

This is so simple and you're going to love it. I came up with this over the Thanksgiving weekend while we were at a friend's house. My husband bought some Strongbow (apple cider), which I'm not typically a huge fan of because it's really dry. So, here's my solution to enjoying a delicious Strongbow, without your mouth feeling like you've sucked a cotton ball.

Thanksgiving Apple Cocktail
Makes 1 drink (plus a second one afterwords)

1/2 can Strongbow Cider
1/2 can Canada Dry Ginger Ale (any brand will do but Canada Dry is the very best)
6 frozen raspeberries

Mix Strongbow and ginger ale. Add frozen raspberries. Let raspberries thaw as they cool your drink.....wait for it.... I know it's going to take all your will power, but it's worth it.....after about 10 minutes the raspberries should be thawed enough to smash with the back of a spoon and infuse your drink.

You will not be disappointed! (Unless you're my husband, who hates raspberries. What a weirdo!)

Tuesday, 27 September 2011

Featured Recipe

So a friend of mine asked me what she should make for dinner tonight. I said she should make chicken quesadillas because, who doesn't like chicken with peppers, onions, salsa and melty cheese inside a tortilla and then fried? Then I suggested she serve it with Black Bean and Corn Salad, to which she sounded pretty darn excited. So, Tahnee, this one's for you.

Black Bean and Corn Salad

1 can black beans
1can of corn (or about 3/4 cup frozen corn, thawed)
2 roma tomatoes, diced
2 small green onions, diced
1 TBSP extra virgin olive oil
1 tsp lime juice
1 tsp chili powder
1/2 tsp each cumin, paprika and garlic powder
1/2 tsp honey
salt and pepper to taste

1. Rinse the black beans well. Set aside to drain
2. Mix the dressing and whisk well.
3. Mix the beans and veggies and coat with the dressing
4. Let sit about 30 minutes in the fridge. Stir thoroughly to coat before serving

Monday, 19 September 2011

Featured Recipe

The Day-Before-Payday Soup

I wrote this on Thursday last week, but had an incredibly lazy weekend and didn't get around to posting it (I couldn't find it in me to tear myself away from watching Sliders on Netflix. Yes, that show from the early nineties with Jerry O'Connel about 4 people who slide to parallel earths. So Awesome).

Sometimes payday comes at a really inconvenient time: your mortgage payment is due and bills must be paid all on the day before you get your paycheque and of course, your fridge, cupboards and freezer are looking more than a little bare. And you have to figure out what you could possibly take to work for lunch the day before payday. Well, last night, I came up with an idea and it turned out tasting pretty darn good. Now, I am a big fan of soup. I love to make it and I love to eat it and it warms me up on a cool, gray, rainy day like today. And this one used what little produce I had in my fridge and freezer,  took about 5 minutes to make and doesn’t require a pot. I prepped the night before and assembled at work. Let me share it with you:
The Day Before Payday Soup - Serves 1
Ingredients:
  • 1 bouillon cube (I used chicken, but beef or vegetable would work just as well)
  • 2 medium carrots, peeled and sliced into rounds about half a cm thick
  • 2 green onions, sliced thinly
  • 1 handful frozen corn kernels, thawed
  • 2 slices deli meat (we had a wee bit of old fashioned ham in the fridge, but chicken, turkey or roast beef would be yummy too. Whatever you have in your fridge)
  • water
How To:
  • Put the carrot slices in a microwave safe bowl and cover with a little water. Cook on high power for about 1 minute until soft but still firm (mushy carrots in soup don’t do it for me). Drain and set aside to cool slightly
  • Mix all vegetables together in a small, tightly sealed, reusable container. Pack the meat in a separate container or plastic baggie. Keep the bouillon separate.
  • When ready to assemble, boil about 2 cups water in a kettle (2 measuring cups worth (500ml), not the 2 cup line on your kettle (that line is for tea or coffee cup amounts)). Crumble the bouillon cube into your bowl (start with half the bouillon first, then add more until you reach your desired broth strength. I used 1 cube for about 1.5 cups water but I like my broth fairly strong. A typical bouillon cube yields 2 cups of broth). Fill the bowl about ¾ full with the boiling water and stir to dissolve the bouillon.
  • Add the vegetables and meat and let stand for a few minutes so the veggies get warm all the way through. If you’re like me and you like your soup piping hot, you may need to microwave it for about 45 seconds to a minute on high as the cold veggies will have cooled the soup down some as they warm up.
That’s it. Easy peasy.  You can use whatever veggies and meat you have lying around, though veggies that don’t require much (if any) cooking work best. A tomato or some zucchini or spinach would work nicely and you could cook them with the carrots. A nice piece of whole wheat toast or some grainy crackers would be good for dipping and would round out the meal quite nicely. I admit, I did need a few crackers and some cheese about 2 hours later.