Hhomemade bread. These 2 little words tend to inspire two reactions in people: 1. The smell of it baking in the oven is almost as good as eating it hot with melted butter. And 2. Fear. People think that making bread is labour intensive and takes all day and is really hard. I'm here to tell you to have no fear for I have a fail-proof recipe which will give you delicious fresh bread in 1 hour. No mixer required. 4 ingredients. Honest. Oh, and it's delicious.
The trick to bread is all in the kneading. Which can take some practice. Kneading is what activates the gluten which gives bread its texture. If you don't knead it enough, your bread is going to be tough and brickish. When I was a girl, my mom taught me to make bread.
Tuesday, 10 November 2015

Tuesday, 12 August 2014
Toddler Muffins
Hi Friends!
I know it's been about a year and a half since I posted a recipe but I've had a busy life since my last post - I had a baby! She's almost a year old now and I was making some muffins for her this morning and thought I would share the recipe with you. I wanted to make her some muffins that were healthy but delicious and not too much work on my part. The basis was my mom's banana muffin recipe with a whole bunch of tweaks, additions and deletions. They are delicious. I am going to make another batch for me for breakfasts. They are sweet because of the fruit but only have 1/2 cup added sugar. I used coconut oil instead of vegetable oil to make them a bit healthier and added oats for fibre and iron. I used regular all purpose flour but you could substitute in half a cup of whole wheat flour if you wanted. I hope you like them!
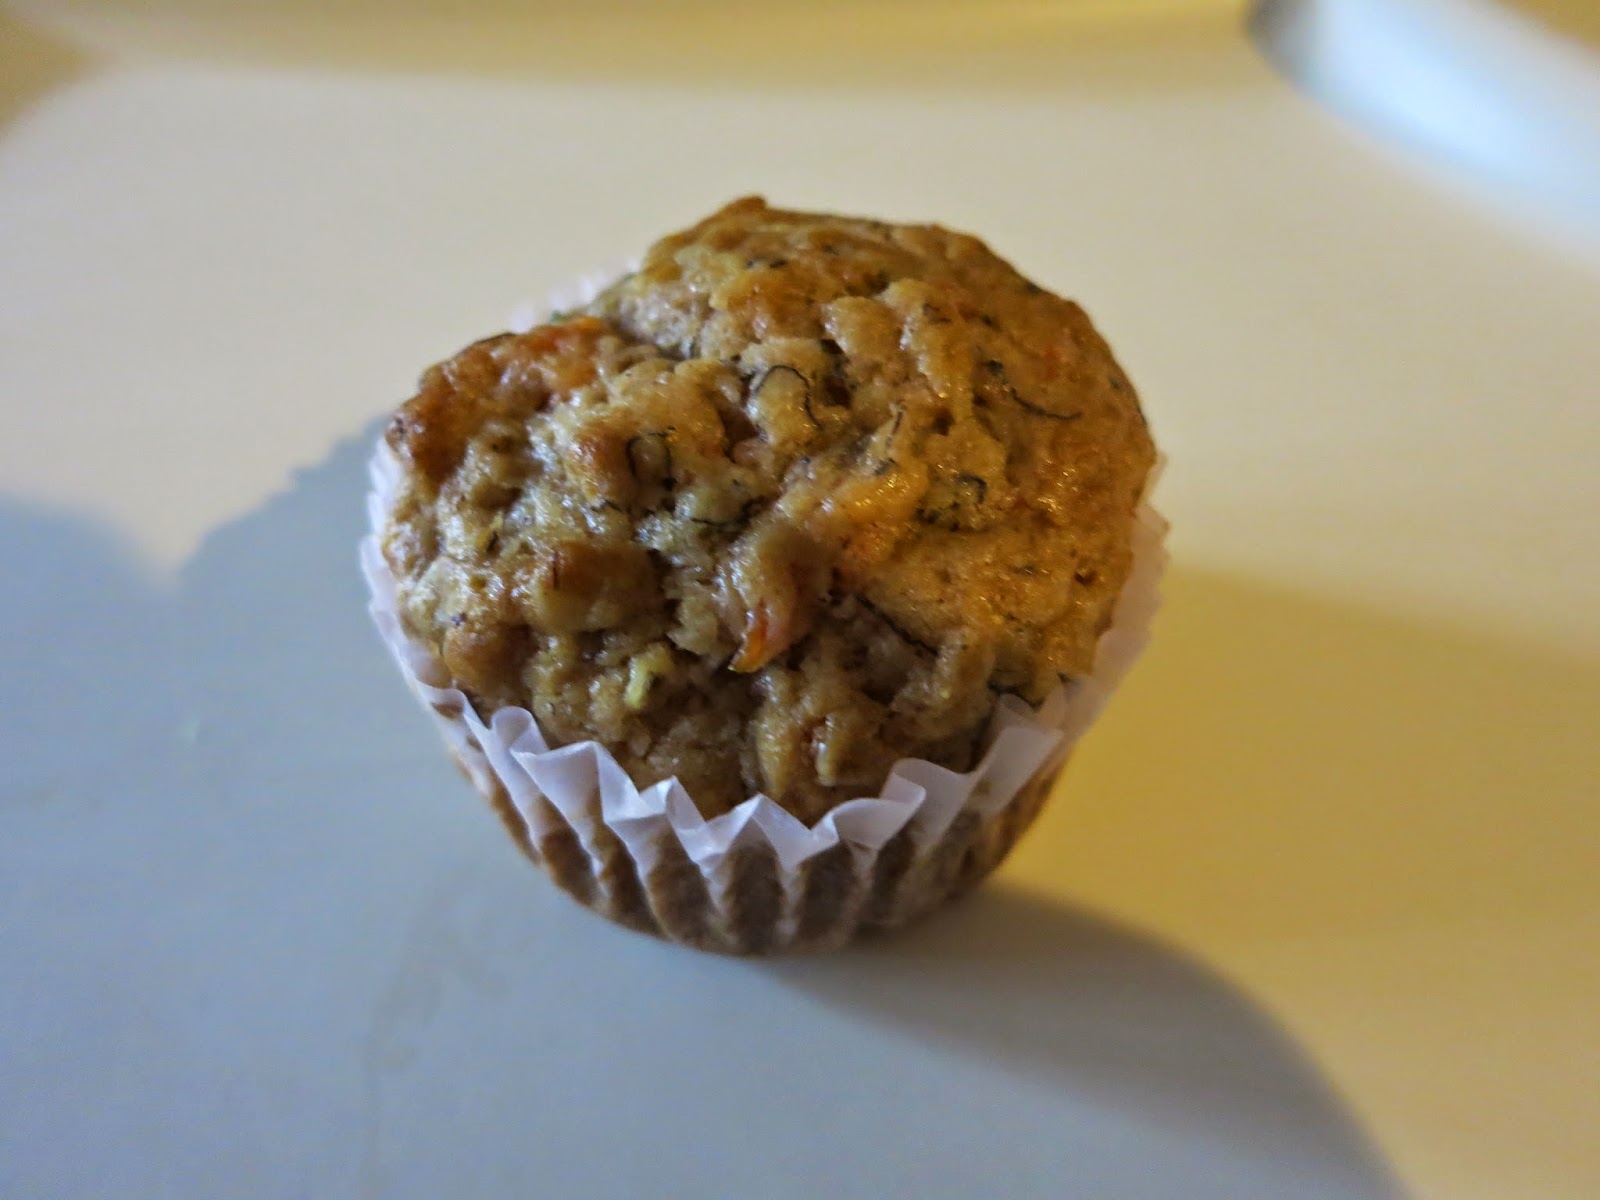
Toddler Muffins
Prep: 15 minutes | Bake: 15-18 minutes | Yield: 1 dozen
Ingredients
1 very ripe banana, mashed
Unsweetened applesauce (approx. 2/3 cup)
6 TBSP coconut oil, melted and cooled
1/2 cup lightly packed golden sugar
1 egg, well beaten
1/4 cup grated carot
1 tsp vanilla
1/2 tsp salt
1 1/2 cups all purpose flour
1 tsp baking soda
1 tsp baking powder
1/4 cup quick oats
sprinkle cinnamon
Method
1. Put banana in a one cup measuring cup. Add enough applesauce to make 1 cup. Stir
2. Mix together coconut oil and brown sugar in a medium bowl. Add egg and vanilla and stir well. Add in banana/applesauce mixture and carrots and stir well. Set aside
3. In a separate bowl, mix together salt, flour, baking soda, baking powder, oats and cinnamon
4.Mix dry ingredients into wet and stir gently until just moistened. Do not overmix!
5. Spoon into lined muffin tins and bake at 375 degrees Fahrenheit for 15-20 minutes. SHould be golden brown on top when done.
These muffins freeze well, or stay fresh stored in a freezer zip-top bag for 4 days max.

I know it's been about a year and a half since I posted a recipe but I've had a busy life since my last post - I had a baby! She's almost a year old now and I was making some muffins for her this morning and thought I would share the recipe with you. I wanted to make her some muffins that were healthy but delicious and not too much work on my part. The basis was my mom's banana muffin recipe with a whole bunch of tweaks, additions and deletions. They are delicious. I am going to make another batch for me for breakfasts. They are sweet because of the fruit but only have 1/2 cup added sugar. I used coconut oil instead of vegetable oil to make them a bit healthier and added oats for fibre and iron. I used regular all purpose flour but you could substitute in half a cup of whole wheat flour if you wanted. I hope you like them!
Toddler Muffins
Prep: 15 minutes | Bake: 15-18 minutes | Yield: 1 dozen
Ingredients
1 very ripe banana, mashed
Unsweetened applesauce (approx. 2/3 cup)
6 TBSP coconut oil, melted and cooled
1/2 cup lightly packed golden sugar
1 egg, well beaten
1/4 cup grated carot
1 tsp vanilla
1/2 tsp salt
1 1/2 cups all purpose flour
1 tsp baking soda
1 tsp baking powder
1/4 cup quick oats
sprinkle cinnamon
Method
1. Put banana in a one cup measuring cup. Add enough applesauce to make 1 cup. Stir
2. Mix together coconut oil and brown sugar in a medium bowl. Add egg and vanilla and stir well. Add in banana/applesauce mixture and carrots and stir well. Set aside
3. In a separate bowl, mix together salt, flour, baking soda, baking powder, oats and cinnamon
4.Mix dry ingredients into wet and stir gently until just moistened. Do not overmix!
5. Spoon into lined muffin tins and bake at 375 degrees Fahrenheit for 15-20 minutes. SHould be golden brown on top when done.
These muffins freeze well, or stay fresh stored in a freezer zip-top bag for 4 days max.
Saturday, 9 March 2013
Gluten Free Peanut Chicken Pizza
I made this last night for dinner at it was Amazing!! It was inspired by the flavours of rice wraps with peanut sauce (which include pork or chicken, rice noodles, shredded carrots, green onion, bean sprouts, lettuce, mint, cilantro and peanut sauce wrapped in rice paper wrappers. These are also really, really delicious). The sauce is also nightshade free (no peppers of any kind) and uses gluten free soy sauce.
The crust is from a gluten free pizza mix (the brand is Duinkerken and I found it at Walmart) that is very good. It does not taste like regular pizza crust, but it is a perfectly acceptable substitute with a great texture and flavour (tip: if there is leftover pizza, be sure to heat it up before you eat it as the crust is not good cold. The nice thing though is that the crust will not get tough if you heat it up in the microwave as there is no gluten). I modified the instructions on the box a bit as I have used it before and found that it needs to be pre-baked before sauce is put on. Also, I only have traditional baking yeast, not quick rising yeast, so I had to prepare it a bit differently. I will include instructions for both below. The first 5 ingredients and most of the instructions for making the dough are taken directly from the box.
You make think that carrots on pizza is really weird, but it totally fits with the overall flavour and gives some nice texture on the slice. I have cilantro listed as an optional ingredient, but only use if you like it. I don't like it myself, but I do know the flavour works well with all the other flavours.
It does take some time to prepare, but it is worth it!
Gluten Free Peanut Chicken Pizza
Prep: 45 minutes | Bake: 20-22 minutes at 425 | Makes: 2, 12-inch thin crust pizzas
Ingredients
Crust:
1 box gluten free crust mix (Duinkerken brand)
2 1/2 tsp quick rising yeast (or traditional baking yeast)
2 TBSP canola oil
1 cup warm water
2 eggs
Sauce:
3-4 TBSP smooth peanut butter
5 TBSP gluten free soy sauce
1 TBSP ground ginger
pinch cumin
2 pinches cinnamon
1/2 tsp black pepper
3 TBSP maple syrup (or honey)
1 tsp lime juice
2 cloves minced garlic
Toppings:
3 boneless, skinless chicken breasts
1 cup carrots, cut into matchsticks
3 green onions, sliced thin
300g mozzarella cheese, shredded
2 tsp fresh cilantro, chopped (optional)
Method
1. Crust: follow the instructions for the dough on the box. It helps to beat the eggs first and mix them with the oil before you add them to the mix. Your fingers will need to be really well oiled or the dough will stick. It takes a bit of effort to press the dough onto the pan, and you will need to oil your fingers regularly and it may not look like it will fit on the pan, but it will, I promise. If you do not have quick rising yeast, use traditional yeast but mix it with the water and 1 TBSP white sugar. Let it proof for at least 5 minutes, then add it to the mix with the eggs and the oil. Pre-bake the crust for 8 minutes
2. Sauce: put the peanut butter in a medium size microwave safe bowl. Add the soy sauce. Heat for 30 seconds in the microwave to help the peanut butter blend better. Add remaining ingredients and mix with a fork until smooth
3. Cook the chicken breasts in a bit of oil until golden on both sides and cooked through. Cube into small pieces and set aside
4. Divide sauce between 2 pre-baked crusts and spread. It will be just a thin layer of sauce but it packs a big flavour. Top with chicken, carrots and green onions then shredded mozzarella
5. Bake for 12-14 minutes, until golden around the edges and cheese is melted. If using cilantro, sprinkle it on the top after it comes out of the oven.
The crust is from a gluten free pizza mix (the brand is Duinkerken and I found it at Walmart) that is very good. It does not taste like regular pizza crust, but it is a perfectly acceptable substitute with a great texture and flavour (tip: if there is leftover pizza, be sure to heat it up before you eat it as the crust is not good cold. The nice thing though is that the crust will not get tough if you heat it up in the microwave as there is no gluten). I modified the instructions on the box a bit as I have used it before and found that it needs to be pre-baked before sauce is put on. Also, I only have traditional baking yeast, not quick rising yeast, so I had to prepare it a bit differently. I will include instructions for both below. The first 5 ingredients and most of the instructions for making the dough are taken directly from the box.
You make think that carrots on pizza is really weird, but it totally fits with the overall flavour and gives some nice texture on the slice. I have cilantro listed as an optional ingredient, but only use if you like it. I don't like it myself, but I do know the flavour works well with all the other flavours.
It does take some time to prepare, but it is worth it!
Gluten Free Peanut Chicken Pizza
Prep: 45 minutes | Bake: 20-22 minutes at 425 | Makes: 2, 12-inch thin crust pizzas
Ingredients
Crust:
1 box gluten free crust mix (Duinkerken brand)
2 1/2 tsp quick rising yeast (or traditional baking yeast)
2 TBSP canola oil
1 cup warm water
2 eggs
Sauce:
3-4 TBSP smooth peanut butter
5 TBSP gluten free soy sauce
1 TBSP ground ginger
pinch cumin
2 pinches cinnamon
1/2 tsp black pepper
3 TBSP maple syrup (or honey)
1 tsp lime juice
2 cloves minced garlic
Toppings:
3 boneless, skinless chicken breasts
1 cup carrots, cut into matchsticks
3 green onions, sliced thin
300g mozzarella cheese, shredded
2 tsp fresh cilantro, chopped (optional)
Method
1. Crust: follow the instructions for the dough on the box. It helps to beat the eggs first and mix them with the oil before you add them to the mix. Your fingers will need to be really well oiled or the dough will stick. It takes a bit of effort to press the dough onto the pan, and you will need to oil your fingers regularly and it may not look like it will fit on the pan, but it will, I promise. If you do not have quick rising yeast, use traditional yeast but mix it with the water and 1 TBSP white sugar. Let it proof for at least 5 minutes, then add it to the mix with the eggs and the oil. Pre-bake the crust for 8 minutes
2. Sauce: put the peanut butter in a medium size microwave safe bowl. Add the soy sauce. Heat for 30 seconds in the microwave to help the peanut butter blend better. Add remaining ingredients and mix with a fork until smooth
3. Cook the chicken breasts in a bit of oil until golden on both sides and cooked through. Cube into small pieces and set aside
4. Divide sauce between 2 pre-baked crusts and spread. It will be just a thin layer of sauce but it packs a big flavour. Top with chicken, carrots and green onions then shredded mozzarella
5. Bake for 12-14 minutes, until golden around the edges and cheese is melted. If using cilantro, sprinkle it on the top after it comes out of the oven.
 |
| This is the pizza crust mix |
 | |
| Finished Product |
 |
| Yum! |
Wednesday, 13 February 2013
Gluten-Free, Nightshade-Free 3 Cheese Sausage Lasagne
I know, I know it's been about 3 months since my last post. Life has been really busy (when is it not?) but that is no excuse.
In January, my husband and I decided to do a 60-day gluten-free trial to see if it would help him feel better (both his mother and his sister are gluten intolerant, so it's likely he is too). Lo and behold, he feels better! After many experiments in the gluten-free realm, I feel pretty confident in cooking gluten free (I've done some baking experiments too, and they have turned out relatively well, though I still need some practice).
Nightshade free, on the other hand, has been a little more difficult. What are nightshades, you ask? They are a family of flowering plants that include tomatoes, tomatillos, peppers of all kinds (including bell peppers, chilies, paprika, chili powder, etc), eggplant and potatoes (though potatoes don't seem to bother my husband - we think it's because they are the root and not the fruit). Here's a link to what Wikipedia has to say about them: http://en.wikipedia.org/wiki/Nightshade. Trying to find food that does not contain nightshades is very hard. Lots of things have "spice" on the label, which can often contain peppers of some sort (usually paprika or red bell pepper) so we can never be certain. Cooking from scratch is just the best way to go, because then I know what is going into the food.
This lasagne has 3 cheeses (ricotta, parmesan and mozzarella) and a creamy sauce. I used brown rice lasagne noodles (no need to pre-cook) and sweet rice flour as a thickener for the sauce (instead of corn starch - sweet rice flour won't make it goopy the next day like corn starch does). You needs lots of sauce to cook the rice noodles properly. I used mild Italian sausage meat (or you could buy Italian sausages and remove the casings if you can't find the meat on its own); the only thing I'm concerned about is that is has "spice" as an ingredient, so it may not be 100% nightshade free. You could use any kind of ground meat to be certain or if you don't eat pork for whatever reason.
Gluten-Free, Nightshade-Free 3 Cheese Sausage Lasagne
Prep: 30-45 minutes | Cook: 45 minutes | Yield: one 9x13 pan (about 6 large servings)
Ingredients:
1 package mild Italian sausage meat (or other ground meat) - about 1 pound
3 large cloves garlic, minced (I used my garlic press)
2 TBSP butter
3 cups 1% milk
4 TBSP sweet rice flour
1 large shallot, minced
1 tsp dried thyme
1 tsp each salt and pepper
300g ricotta cheese (this is a standard container size)
2 TBSP shredded parmesan cheese
1 TBSP Johnny's Garlic Seasoning
10 gluten-free brown rice lasagne noodles
250g grated mozzarella
vegetable oil spray
Method:
1. Cook the sausage in a large pan over medium-high, breaking it up as you cook it. When the meat is mostly cooked, add the garlic and cook until the meat is no longer pink and is cooked through. Remove the meat to a separate bowl, leaving the cooking grease in the pan.
2. Return the pan to the stove and reduce the heat to low. Add the butter and melt. Once the butter is melted, add the shallot and cook for about 1 minute.
3. While the butter is melting, mix the sweet rice flour with the milk. Mix well to avoid lumps. Once the shallot is cooked, add the milk to the pan. Cook, stirring frequently, until the sauce thickens. This could take up to 15 minutes - be patient! Once the sauce is thick, add the meat back to the sauce and stir to incorporate fully. Remove from heat and set aside to cool slightly.
4. Mix the ricotta cheese with the parmesan and the Johnny's Garlic. Set aside.
5. Pre-heat the oven to 350 degrees F. Spray the pan with vegetable oil. Spread just over half the sauce evenly on the bottom of the pan. Place 4 rice noodles across the width of the sauce (side-by-side, not overlapping) and then place 1 noodle across the end of the pan (you may need to break it to make it fit).
6. Top the noodles with the ricotta mixture and spread evenly. Add a second layer of noodles (same as before and top with the rest of the sauce. Make sure the noodles are completely covered. Cover with the grated mozzarella.
7. Cover with tinfoil and cook for 30 minutes. After 30 minutes, remove the tinfoil and return to the oven for an additional 15 minutes. Let cool at least 5 minutes before serving.


In January, my husband and I decided to do a 60-day gluten-free trial to see if it would help him feel better (both his mother and his sister are gluten intolerant, so it's likely he is too). Lo and behold, he feels better! After many experiments in the gluten-free realm, I feel pretty confident in cooking gluten free (I've done some baking experiments too, and they have turned out relatively well, though I still need some practice).
Nightshade free, on the other hand, has been a little more difficult. What are nightshades, you ask? They are a family of flowering plants that include tomatoes, tomatillos, peppers of all kinds (including bell peppers, chilies, paprika, chili powder, etc), eggplant and potatoes (though potatoes don't seem to bother my husband - we think it's because they are the root and not the fruit). Here's a link to what Wikipedia has to say about them: http://en.wikipedia.org/wiki/Nightshade. Trying to find food that does not contain nightshades is very hard. Lots of things have "spice" on the label, which can often contain peppers of some sort (usually paprika or red bell pepper) so we can never be certain. Cooking from scratch is just the best way to go, because then I know what is going into the food.
This lasagne has 3 cheeses (ricotta, parmesan and mozzarella) and a creamy sauce. I used brown rice lasagne noodles (no need to pre-cook) and sweet rice flour as a thickener for the sauce (instead of corn starch - sweet rice flour won't make it goopy the next day like corn starch does). You needs lots of sauce to cook the rice noodles properly. I used mild Italian sausage meat (or you could buy Italian sausages and remove the casings if you can't find the meat on its own); the only thing I'm concerned about is that is has "spice" as an ingredient, so it may not be 100% nightshade free. You could use any kind of ground meat to be certain or if you don't eat pork for whatever reason.
Gluten-Free, Nightshade-Free 3 Cheese Sausage Lasagne
Prep: 30-45 minutes | Cook: 45 minutes | Yield: one 9x13 pan (about 6 large servings)
Ingredients:
1 package mild Italian sausage meat (or other ground meat) - about 1 pound
3 large cloves garlic, minced (I used my garlic press)
2 TBSP butter
3 cups 1% milk
4 TBSP sweet rice flour
1 large shallot, minced
1 tsp dried thyme
1 tsp each salt and pepper
300g ricotta cheese (this is a standard container size)
2 TBSP shredded parmesan cheese
1 TBSP Johnny's Garlic Seasoning
10 gluten-free brown rice lasagne noodles
250g grated mozzarella
vegetable oil spray
Method:
1. Cook the sausage in a large pan over medium-high, breaking it up as you cook it. When the meat is mostly cooked, add the garlic and cook until the meat is no longer pink and is cooked through. Remove the meat to a separate bowl, leaving the cooking grease in the pan.
2. Return the pan to the stove and reduce the heat to low. Add the butter and melt. Once the butter is melted, add the shallot and cook for about 1 minute.
3. While the butter is melting, mix the sweet rice flour with the milk. Mix well to avoid lumps. Once the shallot is cooked, add the milk to the pan. Cook, stirring frequently, until the sauce thickens. This could take up to 15 minutes - be patient! Once the sauce is thick, add the meat back to the sauce and stir to incorporate fully. Remove from heat and set aside to cool slightly.
4. Mix the ricotta cheese with the parmesan and the Johnny's Garlic. Set aside.
5. Pre-heat the oven to 350 degrees F. Spray the pan with vegetable oil. Spread just over half the sauce evenly on the bottom of the pan. Place 4 rice noodles across the width of the sauce (side-by-side, not overlapping) and then place 1 noodle across the end of the pan (you may need to break it to make it fit).
6. Top the noodles with the ricotta mixture and spread evenly. Add a second layer of noodles (same as before and top with the rest of the sauce. Make sure the noodles are completely covered. Cover with the grated mozzarella.
7. Cover with tinfoil and cook for 30 minutes. After 30 minutes, remove the tinfoil and return to the oven for an additional 15 minutes. Let cool at least 5 minutes before serving.


Friday, 23 November 2012
Rice Pilaf with Pork
I have never made rice pilaf before. I was never the biggest rice fan but I am learning to be more open to things. I had some instant brown rice in my pantry and wanted to try something new (instant brown rice isn't really "instant" like white rice is, but it only takes about 10 minutes to cook as opposed to 40 minutes. What makes it instant is that it is already partially cooked, then dried. Plus, it's way easier to cook and you don't have to worry about wrecking it by lifting the lid).
I made this with pork stir fry strips, but you could easily substitute chicken or turkey if you wanted.
This recipe looks simple but it is hearty and full of flavour. I served it with a side of steamed garlic zucchini.
Rice Pilaf with Pork
Prep Time: 10 minutes | Cook Time: 20 minutes | Serves: 4
Ingredients:
1 package pork stir fry strips (about 500g)
1 TBSP olive oil
1 small yellow onion, diced
3 cloves garlic, minced
1 3/4 cups chicken broth1/4 tsp each dried parsley and paprika
salt and pepper to taste
2 cups instant brown rice
1 TBSP fresh oregano
Method:
1. Cut stir fry strips into small pieces. In a large, deep pan, cook pork in the olive oil over medium heat stirring frequently until fully cooked, about 6 minutes. Set aside and keep warm.
2. Cook the onion in the same pan that you cooked the pork in. Cook for about 5 minutes, stirring frequently. Add the garlic and cook for 30 seconds.
3. Add the broth and bring to a boil. Add rice, all spices (except the fresh oregano) and salt and pepper and stir until completely mixed. Top with cooked pork. Turn heat to medium-low and cover. Cook for 5 minutes
4. Remove from heat. Stir in fresh oregano. Cover again and let stand for 5 minutes. Stir and serve.

I made this with pork stir fry strips, but you could easily substitute chicken or turkey if you wanted.
This recipe looks simple but it is hearty and full of flavour. I served it with a side of steamed garlic zucchini.
Rice Pilaf with Pork
Prep Time: 10 minutes | Cook Time: 20 minutes | Serves: 4
Ingredients:
1 package pork stir fry strips (about 500g)
1 TBSP olive oil
1 small yellow onion, diced
3 cloves garlic, minced
1 3/4 cups chicken broth1/4 tsp each dried parsley and paprika
salt and pepper to taste
2 cups instant brown rice
1 TBSP fresh oregano
Method:
1. Cut stir fry strips into small pieces. In a large, deep pan, cook pork in the olive oil over medium heat stirring frequently until fully cooked, about 6 minutes. Set aside and keep warm.
2. Cook the onion in the same pan that you cooked the pork in. Cook for about 5 minutes, stirring frequently. Add the garlic and cook for 30 seconds.
3. Add the broth and bring to a boil. Add rice, all spices (except the fresh oregano) and salt and pepper and stir until completely mixed. Top with cooked pork. Turn heat to medium-low and cover. Cook for 5 minutes
4. Remove from heat. Stir in fresh oregano. Cover again and let stand for 5 minutes. Stir and serve.

Saturday, 3 November 2012
Quick Chicken and Sausage Jambalaya
This post is really hard for me to write. I learned yesterday that a colleague was killed in a car accident while she was on vacation overseas. She and I used to talk about food all the time and she loved reading my blog. I shared this recipe with her several years ago and it was her favourite. Every time she made it she would thank me for giving her the recipe and exclaim how good it was. So, Catherine, this post is for you.
My favourite kind of sausage to use in this is Capital brand turkey sausage, but any kind of ready-to-eat sausage would work (kielbasa is yummy.)
Quick Chicken and Sausage Jambalaya
Prep Time: 15 minutes | Cook Time: 30 minutes | Yield: lots
Ingredients:
2 boneless, skinless chicken breasts, diced
1 TBSP olive oil
1 ring turkey or ham sausage, sliced
1 small yellow onion, diced
1 each green, red and yellow peppers, diced
3 large cloves garlic, minced
1 can diced stewed tomatoes
1 cup chicken broth
5-6 heaping handfuls instant brown rice (or more, if you like)
2 pinches ground sage
2 pinches dried thyme
1 1/2 tsp dried oregano
2 good shakes Worcestershire sauce
1 pinch red pepper flakes (or more, to taste)
salt and pepper (to taste)
Method:
1. Heat the olive oil in a large, deep pan over medium heat. Add the chicken, onion and sausage. Cook, stirring occasionally
2. When the chicken is halfway cooked, add the peppers, garlic and all the spices. Cook, stirring occasionally until the chicken is cooked through.
3. Add the Worcestershire sauce, tomatoes, broth and rice. Stir until incorporated. Cook until the rice is done and most of the liquid is gone, about 15 minutes.

My favourite kind of sausage to use in this is Capital brand turkey sausage, but any kind of ready-to-eat sausage would work (kielbasa is yummy.)
Quick Chicken and Sausage Jambalaya
Prep Time: 15 minutes | Cook Time: 30 minutes | Yield: lots
Ingredients:
2 boneless, skinless chicken breasts, diced
1 TBSP olive oil
1 ring turkey or ham sausage, sliced
1 small yellow onion, diced
1 each green, red and yellow peppers, diced
3 large cloves garlic, minced
1 can diced stewed tomatoes
1 cup chicken broth
5-6 heaping handfuls instant brown rice (or more, if you like)
2 pinches ground sage
2 pinches dried thyme
1 1/2 tsp dried oregano
2 good shakes Worcestershire sauce
1 pinch red pepper flakes (or more, to taste)
salt and pepper (to taste)
Method:
1. Heat the olive oil in a large, deep pan over medium heat. Add the chicken, onion and sausage. Cook, stirring occasionally
2. When the chicken is halfway cooked, add the peppers, garlic and all the spices. Cook, stirring occasionally until the chicken is cooked through.
3. Add the Worcestershire sauce, tomatoes, broth and rice. Stir until incorporated. Cook until the rice is done and most of the liquid is gone, about 15 minutes.

Thursday, 25 October 2012
Quinoa Stirfry with Chicken Thighs
This is what I made for dinner tonight and the hubby declared that it was his favourite quinoa dish I've made. Quinoa is so easy to make and I love that it's a complete protein. Plus, it's gluten free!This recipe uses broccoli slaw, which is a pre-made slaw mix of shredded broccoli, carrots and cabbage - it gives the stirfry a satisfying crunch and it's full of all sorts of good vitamins.
Quinoa Stirfry with Chicken Thighs
Prep time: 10 mins | Cook time: 20 mins | Serves 4-6
Ingredients:
1 cup quinoa
1 cup water
1 chicken bouillon cube
4 skinless, boneless chicken thighs
1 TBSP olive oil
1/4 cup onion, diced
2 green onions, diced
3/4 cup broccoli slaw
1/8 tsp each cumin, ginger powder and paprika
salt and pepper to taste
1/2 tsp lemon juice
2 TBSP soy sauce
Method:
1. Rinse the quinoa cold water. Put in a small saucepan and cover with 1 cup water. Crumble the bouillon cube into the water and stir. Cover and put over medium heat and bring to a boil. Once it is boiling, reduce the heat to low and simmer for 15-20 minutes. Resist the urge to lift the lid to check on it. Check after 15 minutes - you will know it is done because the grains will be translucent and all of the water will be absorbed. If it is not quite done, cook for 5 minutes more. Fluff with a fork and let sit about 5 minutes
2. While the quinoa is cooking, cook the chicken. Heat the olive oil in a large pan. Cook the chicken over medium-low heat for about 15 minutes, turning several times. You want it to get crispy on the outside but be careful not to burn it. The chicken should be no longer pin in the middle and the juices will run clear when you cut into it.
3. When the chicken is cooked, remove it to a cutting board. Add the onion to the pan and give it a quick stir. Cut the chicken into small pieces. Once the onion had been cooking for about 5 minutes, return the chicken to the pan. Add the green onions and stir. Cook for about 3 minutes. Add the broccoli slaw, the lemon juice, the soy sauce and all the spices. Stir and cook for about 3 more minutes. Add the quinoa and stir. That's it!

Quinoa Stirfry with Chicken Thighs
Prep time: 10 mins | Cook time: 20 mins | Serves 4-6
Ingredients:
1 cup quinoa
1 cup water
1 chicken bouillon cube
4 skinless, boneless chicken thighs
1 TBSP olive oil
1/4 cup onion, diced
2 green onions, diced
3/4 cup broccoli slaw
1/8 tsp each cumin, ginger powder and paprika
salt and pepper to taste
1/2 tsp lemon juice
2 TBSP soy sauce
Method:
1. Rinse the quinoa cold water. Put in a small saucepan and cover with 1 cup water. Crumble the bouillon cube into the water and stir. Cover and put over medium heat and bring to a boil. Once it is boiling, reduce the heat to low and simmer for 15-20 minutes. Resist the urge to lift the lid to check on it. Check after 15 minutes - you will know it is done because the grains will be translucent and all of the water will be absorbed. If it is not quite done, cook for 5 minutes more. Fluff with a fork and let sit about 5 minutes
2. While the quinoa is cooking, cook the chicken. Heat the olive oil in a large pan. Cook the chicken over medium-low heat for about 15 minutes, turning several times. You want it to get crispy on the outside but be careful not to burn it. The chicken should be no longer pin in the middle and the juices will run clear when you cut into it.
3. When the chicken is cooked, remove it to a cutting board. Add the onion to the pan and give it a quick stir. Cut the chicken into small pieces. Once the onion had been cooking for about 5 minutes, return the chicken to the pan. Add the green onions and stir. Cook for about 3 minutes. Add the broccoli slaw, the lemon juice, the soy sauce and all the spices. Stir and cook for about 3 more minutes. Add the quinoa and stir. That's it!

Sunday, 14 October 2012
Turkey and Ricotta Shepderd's Pie
My Mother-in-law inspired this post as she first came up with this idea for my husband's birthday lunch last month. The secret is adding ricotta cheese to the filling - it keeps it moist, helps it stick together and makes it amazingly creamy. She put crushed corn flakes on top of the potatoes under the cheese which gives it a nice crunch and it compliments the flavours very well - I didn't have cornflakes so I made it without and it worked fine. I would probably add them next time I make this.
This is my version - just made it for dinner and it was so, so good. Plus, it's gluten free, for those who can't eat gluten.
Turkey and Ricotta Shepherd's Pie
Prep Time: 35 minutes | Cook Time: 15 minutes | Serves: 4
Ingredients:
1 pound lean ground turkey
1/2 cup frozen corn
1 TBSP dried onion flakes
1/4 tsp each ground sage and dried oregano
2 tsp Johnny's Garlic Seasoning (or garlic powder)
salt and pepper to taste
300g light, extra smooth ricotta
3-4 large red skin potatoes, peeled and cubed
6 cloves garlic, peeled and smashed
2 chicken bouillon cubes
water
2 TBSP butter
3-5 TBSP 1% milk
1 TBSP Johnny's Garlic Seasoning (or garlic powder)
salt to taste
about 200g grated monterey jack or cheddar cheese (or a mix of both)
Method:
1. Pre-heat the oven to 400 degrees Fahrenheit. Put the diced potatoes, smashed garlic and crumbled bouillon cubes in a large pot and cover with water. Boil until potatoes are tender, about 20 minutes. Drain, reserving 5 TBSP cooking water. Mash the potatoes. Add the butter and mix it in. Add the milk 1 TBSP at a time until you reach your desired consistency (they should be creamy and smooth but still fairly thick)
2. Meanwhile, cook the ground turkey in a large, deep pan until no longer pink. Add all spices and corn. Cook for about 5 minutes. Add the ricotta cheese and the 5 TBSP potato water. Mix throughly.
3. Put the turkey mixture in a 9x9 square casserole dish. Top with the mashed potatoes and then the cheese. Bake for 15 minutes, until the cheese is melted and bubbly. Blast under the broiler for 2 minutes more. Let sit at least 3 minutes before cutting and serving.
This is my version - just made it for dinner and it was so, so good. Plus, it's gluten free, for those who can't eat gluten.
Turkey and Ricotta Shepherd's Pie
Prep Time: 35 minutes | Cook Time: 15 minutes | Serves: 4
Ingredients:
1 pound lean ground turkey
1/2 cup frozen corn
1 TBSP dried onion flakes
1/4 tsp each ground sage and dried oregano
2 tsp Johnny's Garlic Seasoning (or garlic powder)
salt and pepper to taste
300g light, extra smooth ricotta
3-4 large red skin potatoes, peeled and cubed
6 cloves garlic, peeled and smashed
2 chicken bouillon cubes
water
2 TBSP butter
3-5 TBSP 1% milk
1 TBSP Johnny's Garlic Seasoning (or garlic powder)
salt to taste
about 200g grated monterey jack or cheddar cheese (or a mix of both)
Method:
1. Pre-heat the oven to 400 degrees Fahrenheit. Put the diced potatoes, smashed garlic and crumbled bouillon cubes in a large pot and cover with water. Boil until potatoes are tender, about 20 minutes. Drain, reserving 5 TBSP cooking water. Mash the potatoes. Add the butter and mix it in. Add the milk 1 TBSP at a time until you reach your desired consistency (they should be creamy and smooth but still fairly thick)
2. Meanwhile, cook the ground turkey in a large, deep pan until no longer pink. Add all spices and corn. Cook for about 5 minutes. Add the ricotta cheese and the 5 TBSP potato water. Mix throughly.
3. Put the turkey mixture in a 9x9 square casserole dish. Top with the mashed potatoes and then the cheese. Bake for 15 minutes, until the cheese is melted and bubbly. Blast under the broiler for 2 minutes more. Let sit at least 3 minutes before cutting and serving.
Wednesday, 10 October 2012
Pita Pizzas with Pancetta and Fresh Oregano
This recipe was inspired by a recipe I saw in an Australian Women's Weekly cookbook I have but the only similarities are that they are pizzas without tomato sauce (their recipe is just olive oil with garlic and mine is a white sauce with garlic/shallot) and include pork (theirs is ham, mine is pancetta), fresh herbs (they use sage, I use oregano) and cheese (their fontina to my mozzarella). So really, not at all similar.
I like Byblos brand pitas because they are really thin and have a great flavour, but use whatever pitas you can find (Byblos bakery is based in Calgary, AB and they distribute through out Western Canada so you may not be able to get them elsewhere).
Pancetta is Italian bacon, but please, please do not substitute bacon in this recipe. Pancetta has a different flavour and you will be disappointed if you don't use it. You can find already diced pancetta in the deli section of most grocery stores.
Pita Pizzas with Pancetta and Fresh Oregano
Prep Time: 20 minutes | Bake Time: 15 minutes | Yield: 6 pizzas
Ingredients:
6 whole wheat pitas
3 cloves garlic, minced
1 medium shallot, minced
1 scant cup 1% milk
1 TBSP flour
150g diced pancetta
dash of black pepper and salt
2 TBSP fresh oregano, chopped
300g grated mozzarella
Method:
1. Cook the pancetta over medium heat, stirring frequently, until the edges start to brown, about 10 minutes. Remove pancetta to a bowl; keep the fat released by the pancetta in the pan
2. Cook the garlic and the shallot in the pancetta fat until very fragrant but not brown, about 1 minute
3. Add the flour to the milk and mix well
4. Reduce the heat under the pan to medium-low and slowly add the milk/flour mixture, stirring constantly. Add the pepper and salt (resist the urge to salt the sauce more than just a dash as the pancetta is very salty). Sitr frequently until the sauce is thickened and is a uniform consistency 5-7 minutes. Remove form heat
5. Preheat the oven to 425 degrees Fahrenheit. Divide the pitas on 2 baking sheets. Divide sauce evenly between pitas and spread with a spatula. Sprinkle pancetta equally over pitas, then the oregano, then the cheese
6. Bake for 7 minutes, then turn the pan 180 degrees (so the pizzas that were at the back of the oven are now at the front). Return pizzas to the oven and bake for 5-7 minutes longer (until cheese is melted and bubbly). Let sit for 2-3 minutes, then slice in half and serve
I like Byblos brand pitas because they are really thin and have a great flavour, but use whatever pitas you can find (Byblos bakery is based in Calgary, AB and they distribute through out Western Canada so you may not be able to get them elsewhere).
Pancetta is Italian bacon, but please, please do not substitute bacon in this recipe. Pancetta has a different flavour and you will be disappointed if you don't use it. You can find already diced pancetta in the deli section of most grocery stores.
Pita Pizzas with Pancetta and Fresh Oregano
Prep Time: 20 minutes | Bake Time: 15 minutes | Yield: 6 pizzas
Ingredients:
6 whole wheat pitas
3 cloves garlic, minced
1 medium shallot, minced
1 scant cup 1% milk
1 TBSP flour
150g diced pancetta
dash of black pepper and salt
2 TBSP fresh oregano, chopped
300g grated mozzarella
Method:
1. Cook the pancetta over medium heat, stirring frequently, until the edges start to brown, about 10 minutes. Remove pancetta to a bowl; keep the fat released by the pancetta in the pan
2. Cook the garlic and the shallot in the pancetta fat until very fragrant but not brown, about 1 minute
3. Add the flour to the milk and mix well
4. Reduce the heat under the pan to medium-low and slowly add the milk/flour mixture, stirring constantly. Add the pepper and salt (resist the urge to salt the sauce more than just a dash as the pancetta is very salty). Sitr frequently until the sauce is thickened and is a uniform consistency 5-7 minutes. Remove form heat
5. Preheat the oven to 425 degrees Fahrenheit. Divide the pitas on 2 baking sheets. Divide sauce evenly between pitas and spread with a spatula. Sprinkle pancetta equally over pitas, then the oregano, then the cheese
6. Bake for 7 minutes, then turn the pan 180 degrees (so the pizzas that were at the back of the oven are now at the front). Return pizzas to the oven and bake for 5-7 minutes longer (until cheese is melted and bubbly). Let sit for 2-3 minutes, then slice in half and serve
 |
| Pizzas before the cheese has been added |
 |
| Finished product. Yum! |
Monday, 8 October 2012
Double Chocolate Peanut Butter Cookies
If you like chocolate and peanut butter together, you're going to love these. They're chocolate-y, peanut butter-y, crispy on the outside, chewy on the inside and totally delicious.
I wasn't entirely sure if there were going to work as they were an experiment, but they did and I'm really happy with the result.
Double Chocolate Peanut Butter Cookies
Prep: 25 mins | Bake Time 10 minutes | Yield: 3-4 dozen
Ingredients:
1/2 cup softened butter
1/2 cup packed brown sugar
1 cup white sugar
1/2 cup smooth peanut butter
2 squares semi-sweet baker's chocolate, melted and cooled slightly
1 tsp vanilla
2 eggs
2 1/4 cups all purpose flour
1 tsp baking soda
1 cup semi-sweet chocolate chips
Method:
1. Cream together the butter and the sugars until smooth and creamy using a wooden spoon. Add the peanut butter and mix well. Add the melted chocolate (make sure it has had some time to cool because you don't want it to melt the butter) and mix well. Add the vanilla and the eggs, one at a time, mixing well after each egg.
2. Add the flour and baking soda to the peanut butter/chocolate mixture. Blend until just mixed. Add the chocolate chips and stir until incorporated
3. Drop by small teaspoonfuls onto an ungreased, non-stick cookie sheet, about 1 inch apart (if your cookie sheet is not non-stick, grease lightly with a bit of vegetable oil or no-stick spray or line with parchment paper).
4. Bake at 375 degrees Fahrenheit for 10-11 minutes. Check after 10 minutes - if the cookies are very puffy looking, bake for 1 minutes more (this will give them the crunch on the outside ad the chewy centre).
5. Let sit on baking sheet for 1 minute. Transfer to a wire rack and cool for 3 minutes. Put them in an air-tight container while they are still warm.
Be sure to enjoy one or two while they're still warm from the oven with a tall glass of milk

I wasn't entirely sure if there were going to work as they were an experiment, but they did and I'm really happy with the result.
Double Chocolate Peanut Butter Cookies
Prep: 25 mins | Bake Time 10 minutes | Yield: 3-4 dozen
Ingredients:
1/2 cup softened butter
1/2 cup packed brown sugar
1 cup white sugar
1/2 cup smooth peanut butter
2 squares semi-sweet baker's chocolate, melted and cooled slightly
1 tsp vanilla
2 eggs
2 1/4 cups all purpose flour
1 tsp baking soda
1 cup semi-sweet chocolate chips
Method:
1. Cream together the butter and the sugars until smooth and creamy using a wooden spoon. Add the peanut butter and mix well. Add the melted chocolate (make sure it has had some time to cool because you don't want it to melt the butter) and mix well. Add the vanilla and the eggs, one at a time, mixing well after each egg.
2. Add the flour and baking soda to the peanut butter/chocolate mixture. Blend until just mixed. Add the chocolate chips and stir until incorporated
3. Drop by small teaspoonfuls onto an ungreased, non-stick cookie sheet, about 1 inch apart (if your cookie sheet is not non-stick, grease lightly with a bit of vegetable oil or no-stick spray or line with parchment paper).
4. Bake at 375 degrees Fahrenheit for 10-11 minutes. Check after 10 minutes - if the cookies are very puffy looking, bake for 1 minutes more (this will give them the crunch on the outside ad the chewy centre).
5. Let sit on baking sheet for 1 minute. Transfer to a wire rack and cool for 3 minutes. Put them in an air-tight container while they are still warm.
Be sure to enjoy one or two while they're still warm from the oven with a tall glass of milk

Saturday, 6 October 2012
Linguine With Garlic Oil and Pancetta
I made this a short while ago for dinner and it is amazing. I found the recipe in the book Nigella Bites by Nigella Lawson (it is the recipe, in fact that made me want her cookbook). It is posted on her website and I thought I'd share it with you. It is so easy to make and so delicious!
The recipe calls for garlic infused oil, which I didn't actually have, so I just cooked 3 smashed garlic gloves in 2 TBSP of olive oil for about 2 minutes, then discarded that garlic and used that oil and it worked just fine.
Saturday, 8 September 2012
What's For Dinner?
In light of my husband's recent development of food sensitivities (tomatoes, bell peppers, spinach), he has come up with a theory: our bodies are designed to digest food that our ancestors ate, and are less likely to be able to digest foods that weren't available before globalization carried food around the world. His ancestors hail mostly from the United Kingdom and therefore he has challenged me to cook foods that would be classified as "British" to see if his body feels better eating those foods rather than things like spinach and bell peppers.
Here's what I've come up with:
First off, a ham roast (just the pre-cooked kind, not one that you have to cook all day) with garlic mashed potatoes and steamed baby carrots. Good old fashioned comfort food.
Next is Chicken Club Wraps. This is basically a chicken club sandwich in wrap form (cooked diced chicken breast, bacon, lettuce, cheddar cheese wrapped in a whole whet tortilla) . I've taken out the tomato part and added chopped green onion (I add green pepper for me too because I love it) and Caesar dressing.
We're going to have hamburgers with corn on the cob one night as we try to hold on to the last days of summer.
The ultimate comfort food this week is potato chowder, hearty and savoury. You peel and cube the potatoes and cook them in a little veg oil in a deep pot with the onions and carrots. Then you boil that mix in chicken (or veggie) stock with some earthy herbs (oregano, thyme, sage, etc). when the potatoes are super tender, take out about a cup of potatoes and a cup of broth. Puree that until it's smooth and add it back to the soup. This thickens it and gives it a velvety texture. Then add milk, corn, bacon bits and green onions. Top with cheese.
Next, we're going to try a prosciutto and parmesan filled pasta (found this fresh pasta at the grocery store - excited to try it out) with a creamy chicken sauce plus cooked zucchini with garlic.
Then we're going to have beef stroganoff on whole wheat egg noodles plus steamed broccoli. Stroganoff is one of my husband's favourites and I never had it as a kid, so I've had to watch his mom make it and pick up some of her tricks. The trick is instead of using all sour cream, use half sour cream and half onion dip (that way, you don't have to chop up an onion) - if you use a cream cheese based one rather than a sour cream based one, it gives great flavour. I also add paprika for some depth and half a beef bouillon cube.
Lastly, chicken enchiladas. This is one of my favourites and is the only thing on the menu that has peppers. It was my very first "featured recipe" and it just gets better every time. Adding a poblano pepper gives it nice smokiness and serving it with salsa verde (a green sauce made with tomatillos, serrano or jalapeno peppers and cilantro) is key. Latin import stores often carry authentic versions.
I hope this has inspired you.
Bon Apetit!
Here's what I've come up with:
First off, a ham roast (just the pre-cooked kind, not one that you have to cook all day) with garlic mashed potatoes and steamed baby carrots. Good old fashioned comfort food.
Next is Chicken Club Wraps. This is basically a chicken club sandwich in wrap form (cooked diced chicken breast, bacon, lettuce, cheddar cheese wrapped in a whole whet tortilla) . I've taken out the tomato part and added chopped green onion (I add green pepper for me too because I love it) and Caesar dressing.
We're going to have hamburgers with corn on the cob one night as we try to hold on to the last days of summer.
The ultimate comfort food this week is potato chowder, hearty and savoury. You peel and cube the potatoes and cook them in a little veg oil in a deep pot with the onions and carrots. Then you boil that mix in chicken (or veggie) stock with some earthy herbs (oregano, thyme, sage, etc). when the potatoes are super tender, take out about a cup of potatoes and a cup of broth. Puree that until it's smooth and add it back to the soup. This thickens it and gives it a velvety texture. Then add milk, corn, bacon bits and green onions. Top with cheese.
Next, we're going to try a prosciutto and parmesan filled pasta (found this fresh pasta at the grocery store - excited to try it out) with a creamy chicken sauce plus cooked zucchini with garlic.
Then we're going to have beef stroganoff on whole wheat egg noodles plus steamed broccoli. Stroganoff is one of my husband's favourites and I never had it as a kid, so I've had to watch his mom make it and pick up some of her tricks. The trick is instead of using all sour cream, use half sour cream and half onion dip (that way, you don't have to chop up an onion) - if you use a cream cheese based one rather than a sour cream based one, it gives great flavour. I also add paprika for some depth and half a beef bouillon cube.
Lastly, chicken enchiladas. This is one of my favourites and is the only thing on the menu that has peppers. It was my very first "featured recipe" and it just gets better every time. Adding a poblano pepper gives it nice smokiness and serving it with salsa verde (a green sauce made with tomatillos, serrano or jalapeno peppers and cilantro) is key. Latin import stores often carry authentic versions.
I hope this has inspired you.
Bon Apetit!
Wednesday, 5 September 2012
Kitchen Tips - Part 1
Perfect Chocolate Chip Cookies
Everyone has their favourite chocolate chip cookie recipe; whether it's the cookies your mom used to make as an after school snack, a secret family recipe passed down through the generations, a recipe you discovered at the back of a magazine, or simply the recipe from the back of the chocolate chips package.
I don't claim to have the best recipe - in fact, I have a sister-in-law and a friend who both make better chocolate chips cookies than I do and, to me, my Grammie was the reigning queen of baked treats (her double chocolate snaps, nutmeg logs with pink icing and coloured sprinkles, boiled raisin cookies and butterhorns were the best things around), but I found a good recipe (on the back of the chocolate chips package) that suits me just fine.
There are, however, a few tips for making GREAT chocolate chips cookies, no matter the recipe.
Everyone has their favourite chocolate chip cookie recipe; whether it's the cookies your mom used to make as an after school snack, a secret family recipe passed down through the generations, a recipe you discovered at the back of a magazine, or simply the recipe from the back of the chocolate chips package.
I don't claim to have the best recipe - in fact, I have a sister-in-law and a friend who both make better chocolate chips cookies than I do and, to me, my Grammie was the reigning queen of baked treats (her double chocolate snaps, nutmeg logs with pink icing and coloured sprinkles, boiled raisin cookies and butterhorns were the best things around), but I found a good recipe (on the back of the chocolate chips package) that suits me just fine.
There are, however, a few tips for making GREAT chocolate chips cookies, no matter the recipe.
- The fat you use - I always use butter and have found that it creates the best flavour. I have tried shortening (when I really wanted cookies but had no butter) and they were okay, but butter works best. Hard margarine works to, but I avoid margarine at all costs as it contains a huge number of ingredients I can't pronounce and is about 2 ingredients away from being plastic. Truthfully, you can use any kind of fat that is solid at room temperature (butter, hard margarine, shortening, lard) but no oils (your cookies will be a funky texture if you use oil). Also, do not melt the fat (same funky texture as using oil). Changing the fat will change the taste.
- The sugar you use - Many chocolate chip cookie recipes will call for a combination of white sugar and brown sugar. They key here is that a higher ratio of brown sugar will make the cookies chewier; more white sugar will make them crispy. I personally like a soft cookie, so my recipe has twice as much brown sugar as white. (Brown sugar has molasses added to give it its distinct colour and flavour. It varies in darkness depending on the molasses content. I generally use "golden" or light brown sugar because I think it gives the best flavour). Measuring brown sugar is different than measuring white sugar. Brown sugar needs to be "packed" (scoop it into your measuring cup and then press down with the heel of your hand so it compresses ("packs") some. Then add more sugar and press down until you have the full measurement. Perfectly packed brown sugar will keep its shape when you tip it out of the measuring cup.
- The crucial first step - most cookie recipes start the same: "Cream together the butter and sugars. Add the eggs and vanilla." Creaming the butter and sugars together is sooo important in getting the texture right. The butter must be room temperature soft (be careful if you microwave the butter to soften it - a few seconds too long and it's melted and that is not good for your cookies). You need to beat the sugars into the butter for several minutes (please, please, please, use a wooden spoon, not an electric mixer! Using an electric mixer makes the texture too fine and besides, cookies taste better when mixed with a wooden spoon) - you will notice that the mixture gets very creamy and the colour will get lighter than when you started mixing. Only then are you ready to add the eggs. Add them one at a a time and fully mix it in before you add the next one.
- The flour - This step is more important when making cakes and pastries, but it's not a bad habit to get into for cookies. When measuring the flour, use a smaller scoop/cup to spoon the flour into the measuring cup, then level the top with a flat edge like a butter knife. Spooning the flour into the cup gives you a more accurate measurement. If you just scoop it up with the measuring cup you're using and then level it off, it packs the flour into the cup and you will actually get more than you really need.
- Baking - once you've added all the other ingredients, you're ready to bake. Drop by teaspoonfuls onto the baking sheet and bake for the shortest time as suggested by the recipe, then check them. For a softer cookie, they should just be golden around the edges; for a crispier cookie, they should have a light golden colour on the top and darker edges. To keep soft cookies soft, put them into an airtight container when still slightly warm.
- Be sure to eat one or two when they are still warm from the oven with a big class of cold milk!
Saturday, 25 August 2012
Featured Recipe
Okay, these are amazing. Not to toot my own horn or anything, but I was very very happy with the way these turned out. I was a wee bit worried about the flavour and that's the biggest problem with making meatloaf - you can't taste it until it's completely done. Thankfully, they worked and were delicious. I was worried that they would be too spicy, but they weren't at all and had a really nice smoky taste - just what I was hoping for. Not too much work either . We ate them with Mac and Cheese and a side salad.
Smoky Pork Mini-Meatloaves
Ingredients:
1 lb lean ground pork
1 poblano pepper, diced
1/4 red onion, chopped
1 TBSP olive oil
1/4 tsp each dried oregano and paprika
1/2 tsp cumin
1/2 tsp each salt and pepper, divided
1 TBSP Johnny's Garlic Seasoning
2 pinches chipotle chili powder
1 tsp hot sauce (i.e. Frank's Red Hot Sauce)
4 TBSP BBQ sauce (I used Bullseye)
1/4 cup quick oats
Method:
1. Heat olive oil in a pan over medium heat. Add poblano and onion. Cook until very soft, about 12 minutes, stirring frequently. Season with half the salt and pepper. Puree in a food proceesor until smooth. Cool in the freezer for 5 minutes
2. Add all remaining ingredients into a large bowl. Add pepper mixture. Gently mix with your hands until just mixed (be careful not to mix the meat too much as that can make your meatloaf tough).
3. Form into mini loaves (about the size of a hamburger patty and about 1.5 inches thick). Cook at 400 degrees Fahrenheit on a drip tray for 20 minutes (the drip tray helps them get crispy all the way around as the fat can drain off); flip and cook for 20-25 minutes more (until the temp reads 170 on a meat thermometer).

Smoky Pork Mini-Meatloaves
Ingredients:
1 lb lean ground pork
1 poblano pepper, diced
1/4 red onion, chopped
1 TBSP olive oil
1/4 tsp each dried oregano and paprika
1/2 tsp cumin
1/2 tsp each salt and pepper, divided
1 TBSP Johnny's Garlic Seasoning
2 pinches chipotle chili powder
1 tsp hot sauce (i.e. Frank's Red Hot Sauce)
4 TBSP BBQ sauce (I used Bullseye)
1/4 cup quick oats
Method:
1. Heat olive oil in a pan over medium heat. Add poblano and onion. Cook until very soft, about 12 minutes, stirring frequently. Season with half the salt and pepper. Puree in a food proceesor until smooth. Cool in the freezer for 5 minutes
2. Add all remaining ingredients into a large bowl. Add pepper mixture. Gently mix with your hands until just mixed (be careful not to mix the meat too much as that can make your meatloaf tough).
3. Form into mini loaves (about the size of a hamburger patty and about 1.5 inches thick). Cook at 400 degrees Fahrenheit on a drip tray for 20 minutes (the drip tray helps them get crispy all the way around as the fat can drain off); flip and cook for 20-25 minutes more (until the temp reads 170 on a meat thermometer).

Sunday, 12 August 2012
Featured Recipe
This idea came about from a conversation with my brother-in-law (who is also a bit of a foodie) who was telling me about savoury waffles. We had quite the conversation about all the different kinds that could be made and, to be honest, he beat me to the punch and made ham, cheese and broccoli waffles a few months ago. I made these tonight and they were really, really good! I made a bell pepper sauce to go on them which just rounded out the whole flavour. If you're looking for a savoury option for breakfast (or dinner), these are the waffles for you!
Savoury Ham and Cheese Waffles with Bell Pepper Sauce
Ingredients (waffles:)
1 1/3 cups flour
2 tsp baking powder
1/2 tsp salt
1/8 tsp paprika
1 1/4 cups milk
5 TBSP vegetable oil
2 eggs, separated
150 grams of sharp cheddar cheese
6 slices deli ham, coppped
Method:
1. Mix dry ingredients in a large bowl. Set aside
2. Separate the eggs. Put the egg yolks in a medium size bowl, beat with a fork and set aside. Put the egg whites in a glass bowl and beat with a mixer until stiff peaks form. Set aside
3. Mix the remaining wet ingredients, except egg whites, into the bowl with the egg yolks. Add the ham and the cheese
4. Make a well in the dry ingredients and pour the wet into the well. Mix gently until everything is incorporated. Gently fold in the egg whites
5. Cook on a hot, non-stick Belgian waffle maker (round waffles with really big "holes"). Cook until deep golden. Serve with bell pepper sauce (recipe follows)
Ingredients (sauce)
1 each red and poblano peppers, roughly diced
1/2 green pepper
1/4 small red onion, roughly diced
1 splash grapeseed oil
1/4 tsp dried oregano
1/2 tsp Johnny's Garlic Seasoning
1/2 tsp each salt and pepper
1/2 vegetable (or chicken) bouillon cube
1/4 cup water
Method:
1. Heat the grapeseed oil in a large pan. Cook the peppers and onion for about 5 minutes, until soft.
2. Add the remaining ingredients (except the water) and cook for about 3 minutes more. Turn off the heat.
3. Add the water to de-glaze the pan. Pour into a large bowl and puree with a hand blender (or use a regular blender) until pureed (but don't make it super smooth, you want it to have some texture). Serve warm over fresh waffles.
This sauce would also be really good on pizza.
Savoury Ham and Cheese Waffles with Bell Pepper Sauce
Ingredients (waffles:)
1 1/3 cups flour
2 tsp baking powder
1/2 tsp salt
1/8 tsp paprika
1 1/4 cups milk
5 TBSP vegetable oil
2 eggs, separated
150 grams of sharp cheddar cheese
6 slices deli ham, coppped
Method:
1. Mix dry ingredients in a large bowl. Set aside
2. Separate the eggs. Put the egg yolks in a medium size bowl, beat with a fork and set aside. Put the egg whites in a glass bowl and beat with a mixer until stiff peaks form. Set aside
3. Mix the remaining wet ingredients, except egg whites, into the bowl with the egg yolks. Add the ham and the cheese
4. Make a well in the dry ingredients and pour the wet into the well. Mix gently until everything is incorporated. Gently fold in the egg whites
5. Cook on a hot, non-stick Belgian waffle maker (round waffles with really big "holes"). Cook until deep golden. Serve with bell pepper sauce (recipe follows)
Ingredients (sauce)
1 each red and poblano peppers, roughly diced
1/2 green pepper
1/4 small red onion, roughly diced
1 splash grapeseed oil
1/4 tsp dried oregano
1/2 tsp Johnny's Garlic Seasoning
1/2 tsp each salt and pepper
1/2 vegetable (or chicken) bouillon cube
1/4 cup water
Method:
1. Heat the grapeseed oil in a large pan. Cook the peppers and onion for about 5 minutes, until soft.
2. Add the remaining ingredients (except the water) and cook for about 3 minutes more. Turn off the heat.
3. Add the water to de-glaze the pan. Pour into a large bowl and puree with a hand blender (or use a regular blender) until pureed (but don't make it super smooth, you want it to have some texture). Serve warm over fresh waffles.
 |
| Waffles with the sauce on top |
This sauce would also be really good on pizza.
What's For Dinner?
I know it's been quite a while since I've done a "What's for Dinner" feature and, to be honest, I've had very little inspiration and my menus have been very boring repeats of the same things I cook all the time.
This week, things have changed. I was sick if cooking the same stuff over and over so I have at least 3 creative meals this week. My husband has some favourites so I've mixed those with the creative ones.
The first is an experiment and I made them tonight and they are so good! Savoury Ham and Cheese Waffles with Bell Pepper Sauce. Mixed sharp cheddar and diced ham into my mom's waffle recipe. The served them with a sauce made of green, red and poblano peppers cooked with red onion and a wee bit of veggie stock. They are good enough to be this week's featured recipe.
Next up, chicken club wraps. Cook chicken and sprinkle with some Johnny's Garlic Seasoning. Warm a whole wheat flour tortilla and put a on few thin slices of cheese, some chicken, bacon bits, green onion, green pepper, chopped tomatoes, lettuce and Caesar dressing and wrap up. Simple and quick and delicious
Next, Peanut Noodles with Chicken, Carrots and Red Pepper. This is one I came up with when I first got married and it's a favourite. Cook up some whole wheat spaghetti. Meanwhile, cook diced chicken breast with red onion, julienne carrots and julienne red peppers (julienne is just a fancy French word for really thinly sliced). Stir in some store bought spicy peanut sauce (I like President's Choice Memories of Szechaun), some warm spices (like ginger, cinnamon, cayenne), some green onion, and a few drops of sesame oil. Add cooked spaghetti and stir to completely coat. A nice change from tomato based spaghetti.
Next up, Smoky Pork Mini Meatloaves with poblano peppers and new potatoes. This is also an experiment and I'm not quite sure how it's going to work. I am envisioning roasting the poblano pepper with some white onion, then pureeing and adding it to the ground pork with some oats, cumin, chipotle chili and maybe some bbq sauce and/or Frank's Red Hot sauce. I have learned from my mother-in-law that if you make mini meatloaves and just cook them on a cookie sheet, they get crispy all the way around (no more soggy meatloaf!). Serve with boiled new potatoes. Fingers crossed it works out.
The third experiment is going to be mini beef meatballs with a sesame/soy quinoa salad. Quinoa, bean sprouts, green onion, lettuce with a sesame/soy ginger dressing. Then toss in some mini beef meatballs (home made, of course). Should be good.
Last up, Creamy Chicken Carbonara Penne. Chicken, bacon, red peppers and onions in a delicious creamy sauce serve over whole wheat pasta (penne or rotini work best). This is one of my husband's all time favourites (pretty much any creamy pasta sauce will please him, but this is one of his faves). I've made this with leftover pork tenderloin before and it was divine.
One last thing - a tip for today: if you cook with any kind of hot pepper (poblano, jalapeno, banana, etc) make sure you WASH YOUR HANDS before you touch your face. My face was a bit burn-y because I scratched an itch before washing my hands. Very Important Step!!
I hope this helps you with some ideas for dinner.
Bin Appetit!
This week, things have changed. I was sick if cooking the same stuff over and over so I have at least 3 creative meals this week. My husband has some favourites so I've mixed those with the creative ones.
The first is an experiment and I made them tonight and they are so good! Savoury Ham and Cheese Waffles with Bell Pepper Sauce. Mixed sharp cheddar and diced ham into my mom's waffle recipe. The served them with a sauce made of green, red and poblano peppers cooked with red onion and a wee bit of veggie stock. They are good enough to be this week's featured recipe.
Next up, chicken club wraps. Cook chicken and sprinkle with some Johnny's Garlic Seasoning. Warm a whole wheat flour tortilla and put a on few thin slices of cheese, some chicken, bacon bits, green onion, green pepper, chopped tomatoes, lettuce and Caesar dressing and wrap up. Simple and quick and delicious
Next, Peanut Noodles with Chicken, Carrots and Red Pepper. This is one I came up with when I first got married and it's a favourite. Cook up some whole wheat spaghetti. Meanwhile, cook diced chicken breast with red onion, julienne carrots and julienne red peppers (julienne is just a fancy French word for really thinly sliced). Stir in some store bought spicy peanut sauce (I like President's Choice Memories of Szechaun), some warm spices (like ginger, cinnamon, cayenne), some green onion, and a few drops of sesame oil. Add cooked spaghetti and stir to completely coat. A nice change from tomato based spaghetti.
Next up, Smoky Pork Mini Meatloaves with poblano peppers and new potatoes. This is also an experiment and I'm not quite sure how it's going to work. I am envisioning roasting the poblano pepper with some white onion, then pureeing and adding it to the ground pork with some oats, cumin, chipotle chili and maybe some bbq sauce and/or Frank's Red Hot sauce. I have learned from my mother-in-law that if you make mini meatloaves and just cook them on a cookie sheet, they get crispy all the way around (no more soggy meatloaf!). Serve with boiled new potatoes. Fingers crossed it works out.
The third experiment is going to be mini beef meatballs with a sesame/soy quinoa salad. Quinoa, bean sprouts, green onion, lettuce with a sesame/soy ginger dressing. Then toss in some mini beef meatballs (home made, of course). Should be good.
Last up, Creamy Chicken Carbonara Penne. Chicken, bacon, red peppers and onions in a delicious creamy sauce serve over whole wheat pasta (penne or rotini work best). This is one of my husband's all time favourites (pretty much any creamy pasta sauce will please him, but this is one of his faves). I've made this with leftover pork tenderloin before and it was divine.
One last thing - a tip for today: if you cook with any kind of hot pepper (poblano, jalapeno, banana, etc) make sure you WASH YOUR HANDS before you touch your face. My face was a bit burn-y because I scratched an itch before washing my hands. Very Important Step!!
I hope this helps you with some ideas for dinner.
Bin Appetit!
Monday, 16 July 2012
Featured Recipe
Ok, to be completely honest, I have never had a pulled pork sandwich before. I understand the basics (that pork shoulder cooked low and slow until it's fall-off-the-bone tender and then shredded ("pulled") and simmered in a sweet-smoky sauce and piled high on a soft white bun) but I've never actually eaten one. So when thinking of what to make for dinner tonight (I have been very bad about meal planning and have had to think on the fly for a few days now) I asked my husband to take the pork strips out of the freezer as I was planning to make something with that and some quinoa and whatever few veggies are still in the fridge. He said "we have these really nice buns, why don't you make pulled-pork sandwiches." I said okay but I started to panic a wee bit since, as indicated above, I have never eaten one before and was worried about getting the flavour right. The panic quickly passed and the wheels started turning and what came out tasted "pretty close to bang-on" (according to the hubby). Not bad for trying to re-create a flavour you've never tasted.
These are not "traditional" as I did not cook a pork shoulder for hours and hours until it was uber tender (I cheated and used pork stir fry strips) and I did no actual "pulling" but the flavour was good and they were totally satisfying (and it didn't take me all day).
Pulled Pork Fakies
Ingredients:
1 package uncooked pork stir fry strips (enough for 4 large sandwiches)
2 green onions, minced
1 TBSP vegetable oil
2 TBSP ketchup
1/4 cup thick teryaki sauce (I used Kikkoman brand)
1 tsp barbeque sauce (I used Bulls Eye brand because it's not as vinegar-y as some other brands)
1 tsp lime juice
2 dashes Worcestershire sauce
1 smidge cinnamon (a smidge is about half a pinch or, if your spice is in a shaker jar, one light shake)
1 smidge ginger powder
1 smidge red pepper flakes
1 pinch black pepper
4 large soft, good quality white buns
Method:
1. Slice the pork into very thin slices, then into pieces around 2cm long or so
2. Heat a large pan over medium-low heat (if your burner dial has 8 increments, put it at about 4). Add the oil, green onion and pork and cook, stirring frequently, until pork is cooked through and no longer pink (7-10 minutes)
 3. Make the sauce. Add all the remaining ingredients (except the buns) in a small bowl and mix thoroughly with a fork. Add to the cooked pork
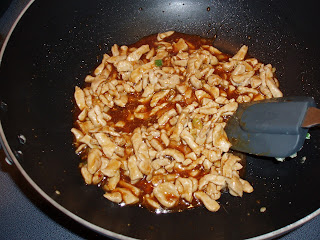 4. Turn the heat to high and bring mixture to a boil. Simmer, stirring frequently, until the sauce is reduced and thickened and clings to the meat (about 12-15 minutes)
 5. Slice each bun in half and top with a quarter of the meat mixture. Enjoy!


These are not "traditional" as I did not cook a pork shoulder for hours and hours until it was uber tender (I cheated and used pork stir fry strips) and I did no actual "pulling" but the flavour was good and they were totally satisfying (and it didn't take me all day).
Pulled Pork Fakies
Ingredients:
1 package uncooked pork stir fry strips (enough for 4 large sandwiches)
2 green onions, minced
1 TBSP vegetable oil
2 TBSP ketchup
1/4 cup thick teryaki sauce (I used Kikkoman brand)
1 tsp barbeque sauce (I used Bulls Eye brand because it's not as vinegar-y as some other brands)
1 tsp lime juice
2 dashes Worcestershire sauce
1 smidge cinnamon (a smidge is about half a pinch or, if your spice is in a shaker jar, one light shake)
1 smidge ginger powder
1 smidge red pepper flakes
1 pinch black pepper
4 large soft, good quality white buns
Method:
1. Slice the pork into very thin slices, then into pieces around 2cm long or so
2. Heat a large pan over medium-low heat (if your burner dial has 8 increments, put it at about 4). Add the oil, green onion and pork and cook, stirring frequently, until pork is cooked through and no longer pink (7-10 minutes)


Saturday, 14 July 2012
Featured Recipe
For some reason, I have a lot of eggs in my fridge. And they will all hit their expiry date before the end of the month and I didn't want them to go bad. Solution: crustless quiche! The nice thing about a crustless quiche is that it is way lighter and does not have the heavy greasiness of a pastry crust, so it is nice even on a summer day. Plus, it takes way less time to prepare. A meat thermometer is handy for this dish as the eggs need to be at least 160 degrees Fahrenheit to be fully cooked but not over 180 or they will turn kind of rubbery.
Crustless Quiche
Ingredients:
6 large eggs
2 TBSP 1% milk
salt and pepper to taste
1/4 green (or red) pepper, finely diced
1 cm wide section red onion, finely diced
1/4 cup bacon bits
1/4 cup grated cheddar cheese
cooking spray or vegetable oil
Method;
1. Pre-heat the oven to 400 degrees F
2. Crack eggs into a medium size bowl. Whisk with a fork together with salt, pepper and milk. Set aside
3. Spray a 9x9 pan with cooking spray (or brush lightly with vegetable oil). Put peppers, onion and bacon in the bottom of the pan and pour the egg over top
4. Top with grated cheese and bake for 20 minutes (eggs need to be at least 160 degrees F but not more that 180 degrees F)
5. Let cool for 5 minutes, then cut into squares
Here are a few other flavour variations to try:
Crustless Quiche
Ingredients:
6 large eggs
2 TBSP 1% milk
salt and pepper to taste
1/4 green (or red) pepper, finely diced
1 cm wide section red onion, finely diced
1/4 cup bacon bits
1/4 cup grated cheddar cheese
cooking spray or vegetable oil
Method;
1. Pre-heat the oven to 400 degrees F
2. Crack eggs into a medium size bowl. Whisk with a fork together with salt, pepper and milk. Set aside
3. Spray a 9x9 pan with cooking spray (or brush lightly with vegetable oil). Put peppers, onion and bacon in the bottom of the pan and pour the egg over top
4. Top with grated cheese and bake for 20 minutes (eggs need to be at least 160 degrees F but not more that 180 degrees F)
5. Let cool for 5 minutes, then cut into squares
Here are a few other flavour variations to try:
- mushroom, spinach and gruyere
- ham, broccoli and swiss
- sundried tomato, basil, mozzarella
- turkey sausage and monterey jack cheese
- mild Italian sausage (pre-cooked), red pepper, parmesan and mozzarella
Wednesday, 4 July 2012
Featured Recipe
I ADORE apple crisp. A lot. The soft apples, the cinnamon, the crunchy granola topping....yum! And my mom makes the very best apple crisp in the world. Sadly, my husband cannot eat cooked apples so I do not make it very often. Plus, it's a lot of work to have just 1 person eat it. So.....I have come up with a 1 serving version that is super quick, low carb, low fat and totally delicious!
Guiltless 5 Minute Apple Crisp
Ingredients:
1 medium McIntosh apple (soft apples like McIntosh work best)
2 shakes of cinnamon
1 tsp brown or white sugar
2 TBSP Kashi Go Lean Crunch cereal or other granola (Go Lean Crunch is the best for this but Harvest Crunch would be good too)
Method:
1. Peel apple and cut into bite-sized pieces. Place in a microwave safe bowl and sprinkle with the cinnamon and sugar
2. Cook in mircowave on high heat for 1 minute. Stir and cook for another 30 seconds or so.
3. Top with cereal and let sit for 1 minute to cool.
For an added treat, top with vanilla ice cream or vanilla yogurt
Guiltless 5 Minute Apple Crisp
Ingredients:
1 medium McIntosh apple (soft apples like McIntosh work best)
2 shakes of cinnamon
1 tsp brown or white sugar
2 TBSP Kashi Go Lean Crunch cereal or other granola (Go Lean Crunch is the best for this but Harvest Crunch would be good too)
Method:
1. Peel apple and cut into bite-sized pieces. Place in a microwave safe bowl and sprinkle with the cinnamon and sugar
2. Cook in mircowave on high heat for 1 minute. Stir and cook for another 30 seconds or so.
3. Top with cereal and let sit for 1 minute to cool.
For an added treat, top with vanilla ice cream or vanilla yogurt
Sunday, 17 June 2012
Featured Recipe
Today's recipe is a variation on basic baking powder biscuits but they are more like a scone than a biscuit. They are sweet but not too sweet and have a pleasant texture. They are particularly good warm from the oven with a bit of butter. I substituted vegetable oil for the traditional shortening as I hate cutting in shortening - it does give it a spongier texture than shortening, but it is much faster and less hassle. I added Peach/Passionfruit curd that I had in my pantry, but you could add apricot or peach jam instead. The curd is nice because it is made with butter and it is not as sticky as jam. Lemon curd would be really lovely too. You could add blueberries or blackberries instead of raspberries if you wanted.
Peach/Passionfruit Raspberry Biscuits
Ingredients:
3-3/12 cups all purpose flour
3 teaspoons baking powder
1 tsp salt
1 TBSP white sugar
1/2 cup vegetable oil
1 cup peach/passionfruit curd
3/4 cup milk
3/4 cup frozen raspberries
Method:
1. Mix together 3 cups of the flour, the baking powder, salt and sugar in a medium sized bowl
2. Add the veg oil, milk and fruit curd. Mix well. Add the frozen raspberries and mix well. The dough should be really soft and a bit sticky, If it is too sticky, add more flour
3. Gently pat about 1/2 cup of the dough into a disc about 1.5 cm thick and about 6-8cm in diameter. Place on an ungreased cookie sheet. Repeat with remaining dough, leaving about 3 cm between biscuits. It should make between 9-12 biscuits
4. Bake at 450 for 8 mins, then turn the pan 180 degrees (so the the biscuits that were at the front of the oven are now at the back) and bake for 5 mins more. They will be light golden on the top and a rich brown on the bottoms when they are done.
6. Let cool at least 10 mins before serving. Freeze any leftovers

Peach/Passionfruit Raspberry Biscuits
Ingredients:
3-3/12 cups all purpose flour
3 teaspoons baking powder
1 tsp salt
1 TBSP white sugar
1/2 cup vegetable oil
1 cup peach/passionfruit curd
3/4 cup milk
3/4 cup frozen raspberries
Method:
1. Mix together 3 cups of the flour, the baking powder, salt and sugar in a medium sized bowl
2. Add the veg oil, milk and fruit curd. Mix well. Add the frozen raspberries and mix well. The dough should be really soft and a bit sticky, If it is too sticky, add more flour
3. Gently pat about 1/2 cup of the dough into a disc about 1.5 cm thick and about 6-8cm in diameter. Place on an ungreased cookie sheet. Repeat with remaining dough, leaving about 3 cm between biscuits. It should make between 9-12 biscuits
4. Bake at 450 for 8 mins, then turn the pan 180 degrees (so the the biscuits that were at the front of the oven are now at the back) and bake for 5 mins more. They will be light golden on the top and a rich brown on the bottoms when they are done.
6. Let cool at least 10 mins before serving. Freeze any leftovers

Subscribe to:
Posts (Atom)